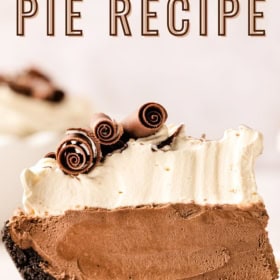
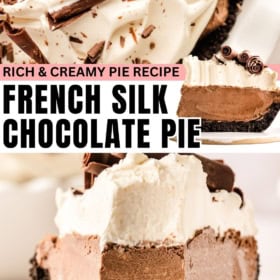


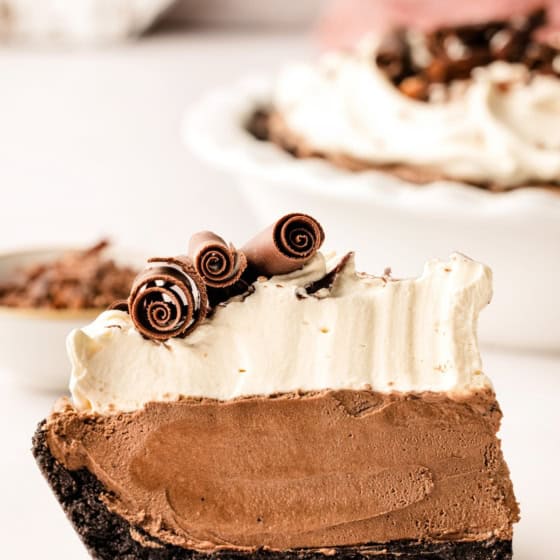
This decadent French Silk Pie recipe has the silkiest, rich chocolate filling, with a crisp Oreo crust, and a cloud of sweet whipped cream on top. And don’t worry, unlike other recipes, this version gently cooks the eggs, making it safe for everyone to enjoy!

My Favorite Chocolate Silk Pie
Growing up, my aunt would make a French Silk Pie every Christmas and my cousins and I would literally fight over the last slice. She shared her pie recipe with me many years ago and after lots of trials and testing, I can confidently say, this French Silk Pie recipe is truly the best I’ve ever had!
While my aunt used a regular homemade pie crust, I prefer an Oreo crust for double the chocolate. I also add a pinch of instant espresso powder to boost the intensity of the chocolate flavor. I promise you will be hooked after just one bite!
What Makes This Chocolate French Silk Pie Recipe So Irresistible?
- Rich Chocolate Flavor: Made with real chocolate instead of cocoa powder, this pie has an intense, deep chocolate taste!
- Velvety Smooth Texture: The filling is whipped to perfection, creating an incredibly airy, silky, and mousse-like texture.
- No Raw Eggs: This recipe gently cooks the eggs, making it safe for everyone to enjoy.
- Perfect for Special Occasions: This elegant pie looks stunning on any dessert table and is always sure to impress!
For all my fellow chocolate lovers, I highly recommend you try… My best chocolate cake recipe, no-bake Reese’s peanut butter pie, and this easy homemade brownie recipe that’s better than a box-mix!

Key Ingredients
If you bake as much as I do, you might already have everything you need in your kitchen. Scroll down to the recipe card below for the full ingredient list and exact amounts!
- Semi-Sweet Chocolate: Avoid using chocolate chips as they contain emulsifiers that can make for a less smooth filling. I like the depth of flavor from bittersweet chocolate or baking chocolate, but you can use a 50/50 mixture of bitter sweet and milk for a sweeter pie. A good quality baking chocolate makes a difference, my favorite luxury brands are Valrhona, Callebaut, and Ghirardelli.
- Espresso Powder: The added espresso powder does wonders for enhancing the chocolate flavor in the pie. Unlike baked goods, you will be able to taste the slightest hint of coffee – so if this is not appealing to you, feel free to leave it out.
- Eggs: They need to be room temperature. And remember, we’re cooking them to 160°F, so you don’t have to worry about consuming them raw.
- Heavy Cream: This is essential for both the filling and the topping. Don’t swap it with any other dairy product or the texture will be off.
- Cream of Tartar: I use a small amount of cream of tartar in my whipped cream. That, plus the addition of powdered sugar helps to stabilize the whipped cream so it will stay fluffy for longer without weeping.

How to Make French Silk Pie
While this pie may be made from scratch, don’t worry – it’s still so easy! The crust is baked for a few minutes, but the filling itself is completely no-bake, making this a great make-ahead dessert recipe. Below is a quick recipe overview, but please scroll down to the recipe card for full instructions.


- Prepare the Oreo Crust: Pulse the Oreos in a food processor until you have crumbs, then add the butter and pulse until it looks like wet sand. Press crust into your pie plate, bake, and then set it aside to cool completely while you make the filling.
- Whip the Cream: Whip the heavy cream until stiff peaks form. Cover the bowl with plastic wrap and refrigerate.
- Cook the Eggs: Fill a pan with some water and bring to a simmer. Place a glass bowl over the pan and whisk the eggs, sugar, and salt in the bowl. Make sure the glass bowl isn’t touching the water! Whisk continuously until the mixture reaches 160°F. Let it cool for about 5 minutes.
- Add the Chocolate: Whisk the melted chocolate, vanilla, and espresso powder into the egg mixture. Let it cool for about 10 more minutes. It’s very important that you allow the egg mixture and the chocolate to cool off as stated in the recipe otherwise the filling can seize.


- Beat the Butter: This is great to do while the chocolate mixture is cooling off! Beat the butter until smooth and creamy. I like to use a hand mixer, or stand mixer, to do this easily.
- Combine the Filling: Slowly mix the egg and chocolate mixture into the creamy butter. Once combined, increase the speed and beat until fluffy. Fold in the whipped cream from earlier.
- Chill: Pour the filling into the cooled Oreo crust. Cover with plastic wrap and refrigerate pie until the filling is firm.
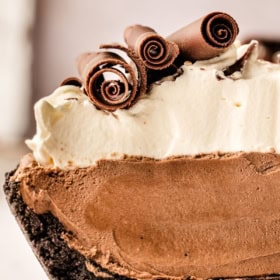
- Garnish: When you’re ready to serve, top the pie with whipped cream. Garnish with chocolate curls or shaved chocolate on top, if desired.

How To Make Chocolate Curls
Melt 1/2 cup semi-sweet chocolate in the microwave in 20-second intervals. Spread a thin layer of melted chocolate on a metal or marble surface. Work quickly, as the action of spreading it on a cold surface will cool the chocolate quickly and it may start to seize. If it starts to seize up, scrape it all off remelt it and try again. I typically use an upturned metal baking pan and a palette knife or a bench scraper to spread the chocolate.
Refrigerate the pan with the chocolate on it for 5 minutes, then let it sit at room temperature for about 3 more minutes. Then use a bench scraper, held at an angle, and scrape the chocolate in a swift and fluid motion to create the curls. The temperature of the chocolate is important – too cold and it will break before it curls, too soft and your curls will be limp. I recommend doing one test area before attempting to scrape the entire surface.

Prepare French Silk Pie in Advance
Once it is topped with the whipped cream, French silk pie is best served that same day, as the whipped cream will start to soften and weep quickly. However, you can prepare it up to two days in advance as long as you do not top it with the whipped cream!
- Make Ahead: Prepare the pie, filled with only the chocolate filling (with no whipped cream on top). Store the pie fully covered (I wrap mine tightly with plastic wrap) in the fridge up to 48 hours in advance.
- Ready To Serve: Beat the whipped cream fresh and spread it on top of the pie, within 2 hours of serving, for the best texture!
Depending on the depth of your pie plate, you may have some filling leftover. Feel free to eat this with a spoon, or if you have good self control, you can pour into a small dessert cup, cover and refrigerate for a treat later!
Chocolate French Silk Pie
Ingredients
For the crust
- 25 Oreo cookies, do not remove the cream filling
- 4 tablespoons salted butter, melted
For the filling
- 1 ½ cups heavy whipping cream
- 4 large eggs, room temperature
- ¾ cup granulated sugar
- ½ teaspoon salt
- 8 oz semi-sweet baking chocolate, chopped fine
- 2 teaspoons vanilla extract
- 1 teaspoon espresso powder, optional
- 12 tablespoons salted butter, cubed, room temperature
For the topping
- 1 ½ cups heavy whipping cream
- ¼ cup powdered sugar
- 1 teaspoon vanilla extract
- ¼ teaspoon cream of tartar
- chocolate curls or shavings, optional topping
Want to save this recipe?
Instructions
For the crust
- Preheat oven to 350ºF.
- Add the Oreo cookies to the bowl of a food processor and pulse to create fine crumbs. Add in the melted butter and pulse until all of the butter is absorbed by the crumbs and they are the consistency of wet sand.
- Press into the bottom and up the sides of a 9-inch deep pie plate. Bake for 10 to 12 minutes, remove from oven and then set aside to cool completely.
For the filling
- In a medium bowl, using a hand mixer, whip the heavy cream until stiff peaks are formed, about 3 to 4 minutes. Cover the bowl with plastic wrap and store in the fridge for later.
- Fill a medium saucepan with 3-inches of water and bring to a simmer. In a glass or heat-proof bowl that is big enough to sit on top of the saucepan, whisk together your eggs, sugar and salt until pale yellow.
- Place the bowl over the pot of simmering water, making sure the bottom of the bowl does not ever touch the simmering water beneath. Cook, whisking vigorously until the mixture reaches 160ºF, about 10 to 12 minutes. Once the egg mixture reaches 160ºF, remove from the heat and let cool for 5 minutes. Make sure to not stop whisking, as this can cause the eggs to start to solidify. If you do not have a thermometer look for the following visual clues: the mixture will get foamy and thicken, coating the back of a spoon.
- In a small heat proof bowl, melt the chocolate in the microwave, heating in 20-second intervals, and stirring until all the chocolate is melted and smooth. Do not overheat, as the chocolate can become grainy and seize up, you want it just melted and pourable.
- Whisk the melted chocolate, vanilla, and espresso powder into the egg mixture until fully combined. Set aside for 10 more minutes to cool.
- While the egg and chocolate mixture cools, beat the butter in the bowl of a stand mixer with a paddle attachment set to medium speed for 2 to 3 minutes, until it becomes smooth and creamy, stopping to scrape the bottom of the bowl once or twice.
- With the mixer on low, slowly add in the egg and chocolate mixture, making sure to scrape the sides and bottom of the bowl once or twice while combining. Once well combined, turn the mixer to medium high speed and whip the mixture until light and fluffy, about 4 to 5 minutes.
- Gently fold in the chilled whipped cream from the fridge in 2 batches. Pour the filling into the cooled crust, wrap tightly with plastic wrap, and refrigerate until firm, at least 6 hours (or up to 48 hours in advance).
For the topping
- Just before serving, make the whipped cream topping. Place the heavy cream in a medium size bowl and whip until thickened using the whip attachment of an electric mixer.
- Add in the powdered sugar, vanilla, and cream of tartar. Continue whipping until medium-stiff peaks are formed.
- Spoon or pipe the whipped cream onto the top of the pie and garnish with the chocolate curls or shavings, if desired. For the cleanest slices, use a sharp knife dipped in hot water and dried before making each cut. Enjoy!
⭐️ Tried this recipe? Leave a comment and rating! It only takes a minute and helps support our family-run blog. ❤️
Notes
Nutrition
Categories:
More Pie Recipes You’ll Love
- Retro vinegar pie has the best silky smooth custard.
- Reese’s peanut butter pie has thick, luscious layers of chocolate and peanut butter!
- Strawberry pretzel pie is equal parts salty and sweet.
- Dutch apple pie is topped with a sweet cinnamon crumb.
Post may contain affiliate links. Read my disclosure policy.

My daughter and I made this for a family get together. Everyone loved it. Will definitely make again!