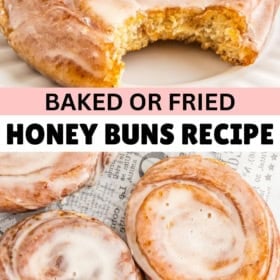


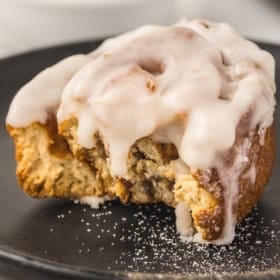
Sweet, sticky, and oh-so-soft, this homemade Honey Bun recipe is a delightful fusion of a cinnamon roll and a yeast donut. Baked or fried, they truly melt in your mouth!

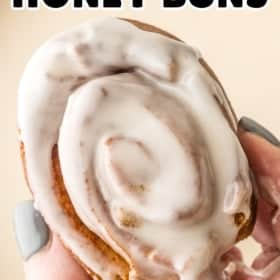
If you’re a fan of store-bought honey buns (looking at you, Little Debbie!) then you will go crazy for this homemade honey bun recipe — they’re even better! They have the perfect pillowy texture with a cinnamon-sugar swirl and a sweet honey glaze. Whether you bake them in the oven or fry them up in some hot oil, you’re going to love these nostalgic treats.
“These honey buns tasted just as good as they look! I fried half of them and baked the other half, both were delicious and we couldn’t decide which we liked more. I accidentally cut mine a little too thick so they puffed up more, but were still perfectly soft and fluffy.” — Simone, skilled home cook and bread maker.

Key Ingredient Notes
Find the full printable recipe with specific measurements below.
- Water: Warm water (or you can also use warm milk) heated to between 105°F-115°F. It’s important to ensure it’s at the right temperature so the dough rises correctly!
- Sugar: A little granulated sugar feeds the yeast and sweetens the dough.
- Instant Yeast: This doesn’t need to be bloomed and can be added with the other ingredients.
- All-Purpose Flour: Fluff the flour and then spoon it into your measuring cup, leveling it with the back of a butter knife. This will ensure you get the proper amount of flour for light and fluffy honey buns.
- Honey: For that classic honey bun taste, do not substitute honey for anything else.
- Shortening: Using melted shortening in the dough will give these honey buns the best bakery-style texture, but if you want to use butter instead, that will also work.
- Oil: It is best to use a mild flavored oil like vegetable oil or peanut oil as it will not add any flavors to what you are frying.

How To Make Honey Buns
Visit the recipe card below for the full directions.
If you prefer to use active yeast, it will need to be bloomed first. Add the yeast to 1/4 cup warm water (105°F-115°F) and let sit for 5 minutes. Then add the bloomed yeast into the other wet ingredients and combine it with the dry ingredients to create the dough.
Give the dough time to rise. Depending on the temperature of your home, the rise time for the dough will vary. In cooler spaces, it may take longer and not double fully, but should still have a noticeable rise. You can always let your dough rise in a slightly warm (but off) oven to speed up proofing.
Knead the dough just until it’s smooth and elastic, but avoid overworking it. If dough is kneaded for too long, it can make the final texture tough and also affect how the dough rises.
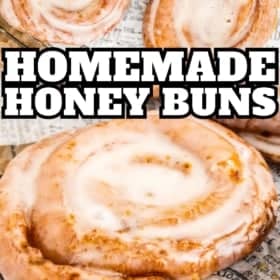
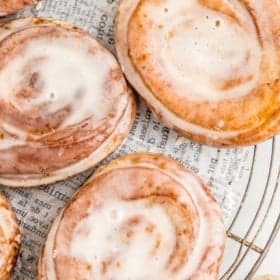
Keep the cinnamon layer thin and even. Too much filling can cause the buns to unravel while frying. A thin, even layer gives you that perfect spiral.
Seal the seam tightly. After rolling the dough into a log, pinch the seam firmly closed so it doesn’t open in the oil.
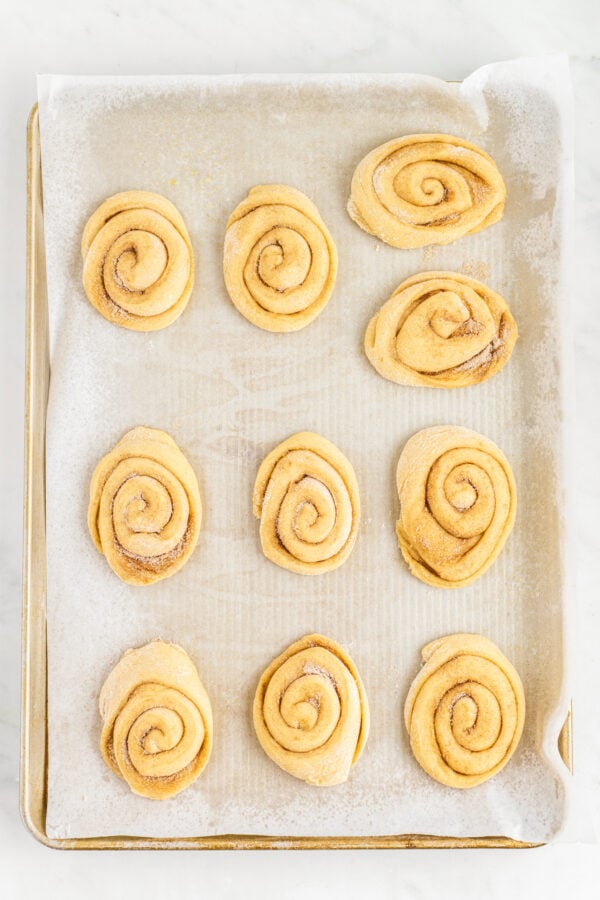
Let the cut buns rest before frying or baking. That short second rise makes them lighter and fluffier. They should look slightly puffy before cooking.
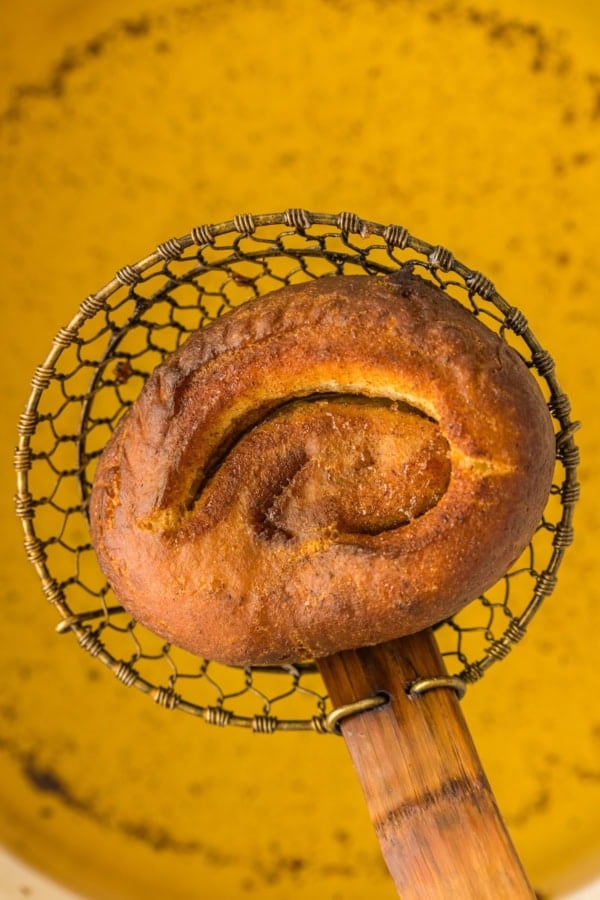
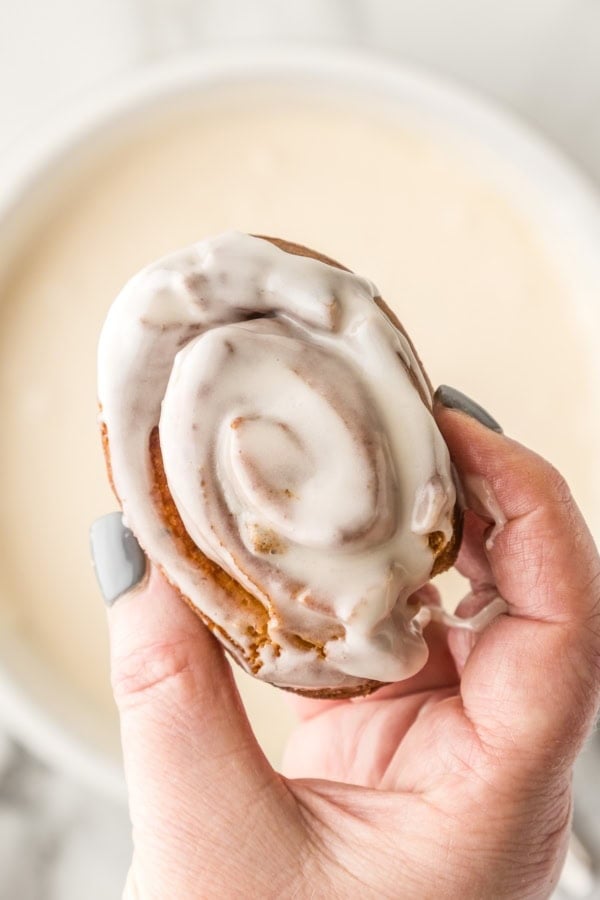
If frying, it’s important to keep your oil between 350°F to 365°F. I highly recommend using a clip-on pot thermometer. Oil that’s too hot will cook the outside too quickly and leave the insides raw. Oil that’s too cool will take longer to cook, making them greasy. You can see in my photos above the honey buns are a little too dark, so my oil was a little too hot!

Bake vs Fried Honey Buns
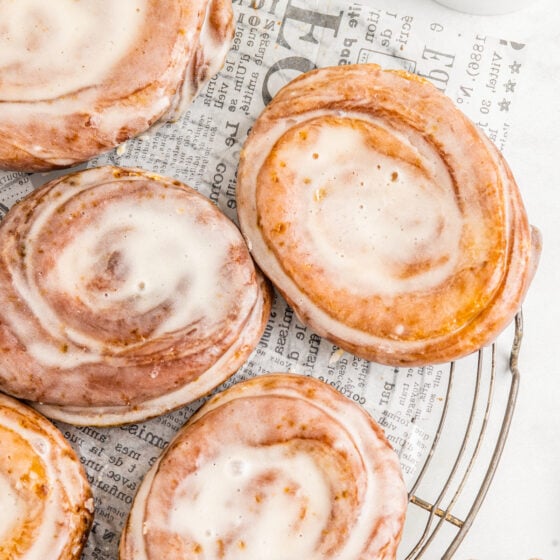
These honey buns can be made either by deep frying or baking in the oven. I personally prefer them best when fried! Baking the honey buns in the oven will create a softer, fluffier texture that is more similar to a cinnamon roll.
Deep frying will create a golden crisp outer texture that will soften over time once coated with the glaze.

Frequently Asked Questions
You can knead the dough by hand, it will just take a bit more effort.
Yes, I often make the dough the night before and cook them fresh the next morning. Refrigerate the dough, for up to 24 hours, after the 1st rise (dough in the bowl covered tightly with plastic wrap) or 2nd rise (sliced honey buns on a baking sheet covered tightly). Remove from fridge the next morning, let rise, and continue with recipe as directed.
Yes, you can freeze the dough. After slicing the buns and proofing them, freeze the un-cooked honey buns on a parchment-lined baking sheet until solid, then transfer to freezer-safe bags with wax paper between them. Fully defrost dough at room temperature before baking or frying.
Make Ahead and Storing
While they are delicious fresh and warm, I personally think they are the best after they have sat in an airtight container on the counter overnight! This gives them that classic softness you expect from a store-bought honey bun. Iced honey buns can be stored in an airtight container at room temperature for up to 5 days.
The best way to reheat them is with just a few seconds in the microwave, about 5 to 10 seconds, or a few minutes in a warm oven.
You can also freeze iced honey buns! Flash-freeze them in a single layer to set the glaze, then transfer to a freezer bag with wax paper between layers to prefect sticking. Defrost fully and warm gently in the microwave before serving.
Homemade Honey Bun Recipe (Baked or Fried)
Ingredients
For the Dough:
- 3 cups all-purpose flour, plus more for rolling
- 3 tablespoons granulated sugar
- 1 tablespoon instant yeast
- ½ teaspoon salt
- ½ cup warm water, between 105°F-115°F
- ⅓ cup honey
- 1 large egg
- 1 teaspoon vanilla extract
- ¼ cup shortening, melted
- Vegetable or peanut oil, for frying
For the Cinnamon Sugar:
- ¼ cup granulated sugar
- 1 ½ teaspoon cinnamon
For the Glaze:
- 4 ⅔ cup powdered sugar
- 2 ½ tablespoons honey
- 1 tablespoon melted butter
- ½ teaspoon vanilla extract
- ¼ teaspoon salt
- Warm water, as needed
Want to save this recipe?
Instructions
- Whisk together the flour, sugar, yeast, and salt. Set aside.
- In a medium sized bowl, whisk to combine the warm water, honey (you can heat the honey for a few seconds in the microwave if it is not pourable), egg, and vanilla extract. Beating just until the egg is well combined. Melt the shortening and add it to the wet ingredients, mixing until well combined.
- With a dough hook on your stand mixer, add the wet ingredients to the dry ingredients. With the stand mixer on low, mix the dough on low until the wet and dry ingredients are well combined.
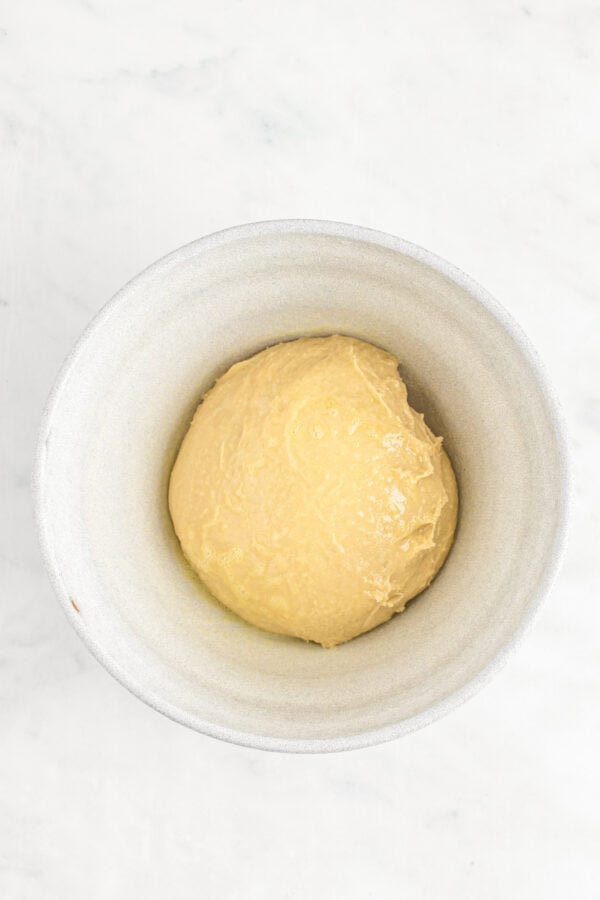
- Once combined, knead the dough on medium speed for 8 minutes. The dough will still be somewhat sticky but workable. Using a bowl scrapper or your hand, shape the dough into a nice ball and place it into a lightly oiled glass bowl, flipping the dough to coat the top of the dough with oil as well.
- Cover the dough with plastic wrap (or a clean kitchen towel) and place in a draft-free slightly warm spot. Let rise for 1 to 2 hours, until it has almost doubled in size. Depending on the temperature of your home, the rise time for the dough will vary. In cooler climates, the dough may not double but should still have a noticeable rise.
- While the dough is rising, whisk to combine the cinnamon and sugar in a small bowl. Set aside.
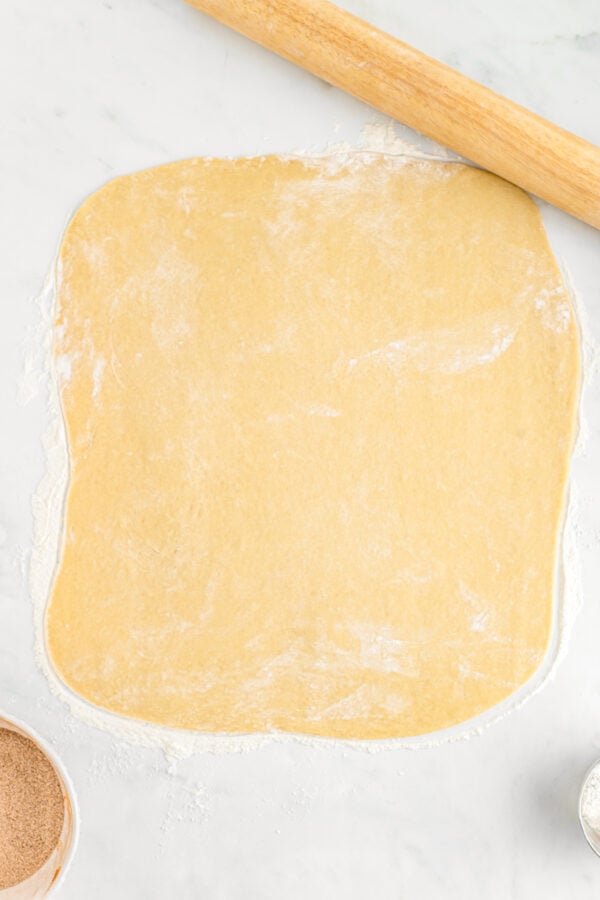
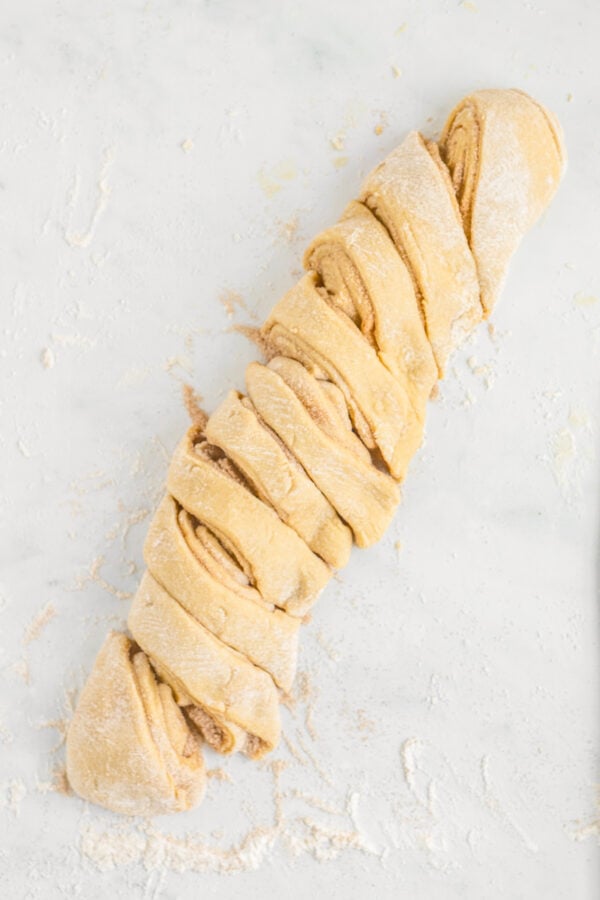
- Once the dough has risen, turn it out onto a lightly floured, clean surface. Roll the dough out to a 12” long and 8” wide rectangle. Dust with the cinnamon sugar mixture leaving a clean edge (you can cover the edge with parchment if needed) and gently press into the dough.
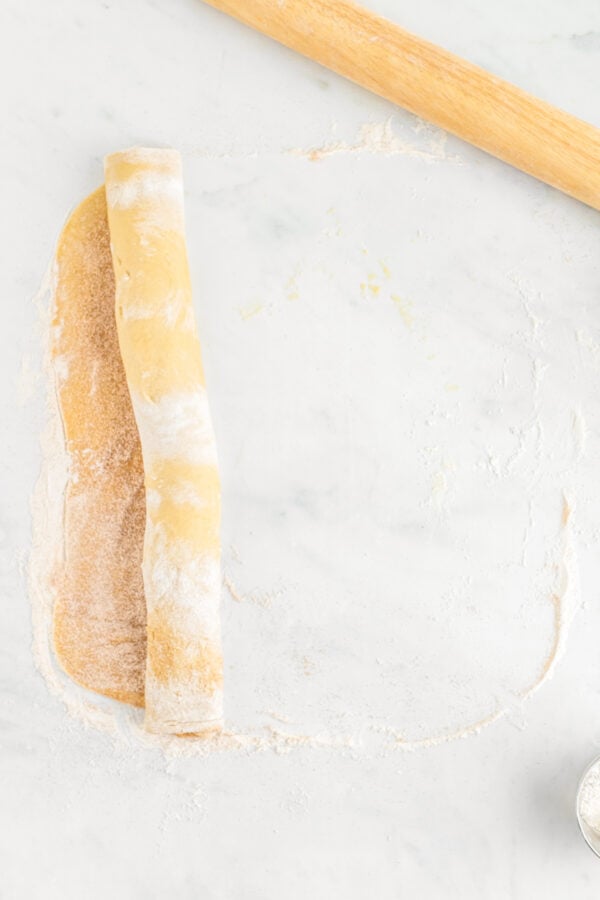
- Roll the dough up from the long side toward the clean edge. Using a pastry brush (or even your finger), brush the clean edge with a little water. Then push the clean edge into the roll and smooth with your finger to adhere the dough together.
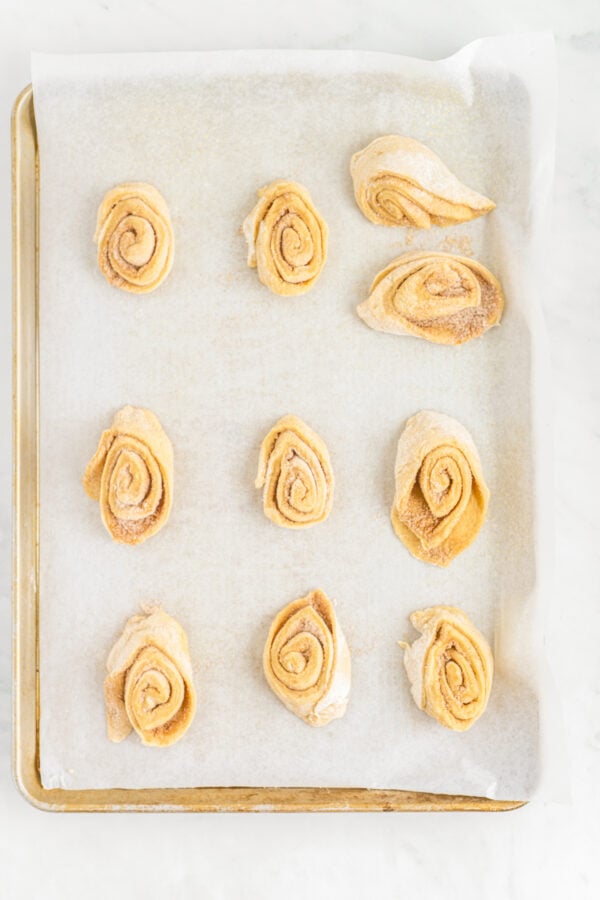
- Using a sharp serrated knife, cut off the pinched ends from the roll, about 1 1⁄2 inches per end. Then cut it equally into 1-inch pieces and place each piece onto a parchment-lined baking sheet with at least 2” space between them. The pieces should be oblong in shape. Press down lightly on each slice and lightly shape each one with your fingers, then let rise for about 45 minutes – until puffy, but not doubled in size.
Frying The Honey Buns
- Part of the way through the rise time, pour oil into a large pan or stockpot until the oil is about 3-inches deep. Heat over medium heat, until the oil reaches 365°F. I highly recommend using a clip-on pot thermometer to ensure your oil is at the correct frying temperature!
- Right before frying the buns, whisk together the glaze. In a medium-sized bowl, whisk to combine the powdered sugar, honey, melted butter, vanilla, and salt. Then add in about 1/3 cup (or up to 1/2 cup) of warm water, whisking until the desired consistency is achieved. If your glaze starts to develop a crust before you’ve glazed your honey buns, stir it and add a little water if needed to make it smooth again.
- Once the rolls have risen, gently press them down again with your fingers, then place a few honey buns into the hot oil, making sure not to crowd the pan. Fry for 90 seconds on one side, then flip and fry for an additional 90 seconds on the other side, until golden brown on both sides.
- Once honey buns are golden brown, remove them from the oil and place them onto a wire cooling rack over a paper towel-lined baking sheet. Immediately dip each bun into the glaze and return to the cooling rack. This will give it that crisp texture once set. Repeat the frying and glazing process with any remaining honey buns.
Baking the Honey Buns
- Preheat your oven to 350°F with the rack placed in the lower third of the oven. Once the rolls have risen, bake for 18 minutes or until the honey buns are lightly golden brown.
- Let them rest for 5 minutes after baking and then dip each bun into the glaze (or brush the glaze on) and place on a wire cooling rack.
⭐️ Tried this recipe? Leave a comment and rating! It only takes a minute and helps support our family-run blog. ❤️
Notes
Video
Nutrition
Categories:
More Sweet Breakfast Recipes To Try
- Filled Donuts – Made from scratch and so easy to customize with your favorite fillings.
- Donut Holes – They’re ready to eat in just 20 minutes!
- Air Fryer Donuts – With a sweet homemade strawberry glaze.
- Honey Bun Cake – If you don’t have the patience for yeast, make this cake instead!
Post may contain affiliate links. Read my disclosure policy.

Love this, so easy to follow and they were so yummyyyyy
WOW! My first time trying make something like this and they were AMAZING! Thanks for the clear instructions!!
The glaze recipe. Quantity typo? I halfed the powdered sugar and it still looks like it will be too much? Dough rose overnight beautifully in the fridge. Everyone loves them. Baked Honeybuns for the win!
Hi Ross! So glad you enjoyed them! So with the glaze – if you had used the full amount of powdered sugar, the glaze would have been a lot thicker. With half of the powdered sugar, the ratios are off making it a lot thinner and runnier. If you want less glaze next time, I’d recommend halving the recipe fully (not just the sugar) so it stays a thicker consistency for glazing the honey buns. Hope this helps!
I have a quick question, would it work to airfry these?
Hi Julia! I don’t know for certain as I haven’t tried it, but I don’t think they would cook through in the middle before the outside turned golden brown. You could probably use the dough cut into small pieces to make honey bun bites, but I don’t think it would work for full-size honey buns.
I can’t wait to try this! Is there anything we can substitute the shortening for or is that what makes it delicious? 🙂
You can use butter instead, but shortening creates that bakery style texture. 🙂
Yum!!
On day 2 of making this dough… still not rising. Following the recipe to the letter. Kinda disappointed. What can I do to make it rise?
Hi Heather, if it has not risen yet, it won’t rise. Have you checked your yeast? And are you sure your water was warm, but not hot? Hot water will kill yeast. To check your yeast to make sure it is still good, combine the amount of yeast the recipe calls for with warm water (no hotter than 110°F) and sugar. Wait about ten minutes. By this point, the yeast mixture should be foamy and give off a bready aroma. If it does not, the yeast has gone bad.
Dough will also not rise in a cool place, so make sure you are placing it a warm area.
Awesome recipe!!!
Thank you! It just would not rise. Warm in the house around 74 so I could not figure it out. I finally took another teaspoon of yeast, warm cup of water and 1 tablespoon of sugar and mixed in back in the dough with more flour. It finally rose… I don’t know if the yeast is just getting old because it is a new jar but after all that I finally got it to rise. I might just add 2 tablespoons of yeast next time to experiment but I am getting ready to roll out the dough now! So excited for these honeybuns 🙂