These Chocolate Chip Scones are buttery, flaky, and packed with melty chocolate chips. The secret? Chilling the dough before baking for the perfect golden crust and tender layers. Serve them warm, and they’ll melt in your mouth!

Tender and Buttery Chocolate Chip Scones
These Chocolate Chip Scones are perfectly tender with a golden crust and lots of flaky layers, thanks to our special trick — chilling the dough before baking! This step ensures the butter stays cold, leading to the flakiest, most irresistible texture. The best part? Just like a breakfast casserole, you can prepare the dough the day before and bake them fresh in the morning — no fuss, no mess, just warm, delicious scones ready for breakfast whenever you are. Here’s why I never mind whipping up a batch:
- Quick & Easy: You don’t even need a mixer — just a bowl, a fork, and your hands!
- Rich Chocolate Flavor: Every bite is packed with melty chocolate chips to satisfy your cocoa cravings.
- Perfect Texture: Thanks to the right butter-to-flour ratio and chilling the dough, these scones are so buttery, with flaky layers, and never dry!
- Simple Ingredients: No fancy ingredients needed — just simple baking staples you likely have on hand.
Bite into more buttery goodness with more easy scone recipes like my blueberry scones and cranberry orange scones!
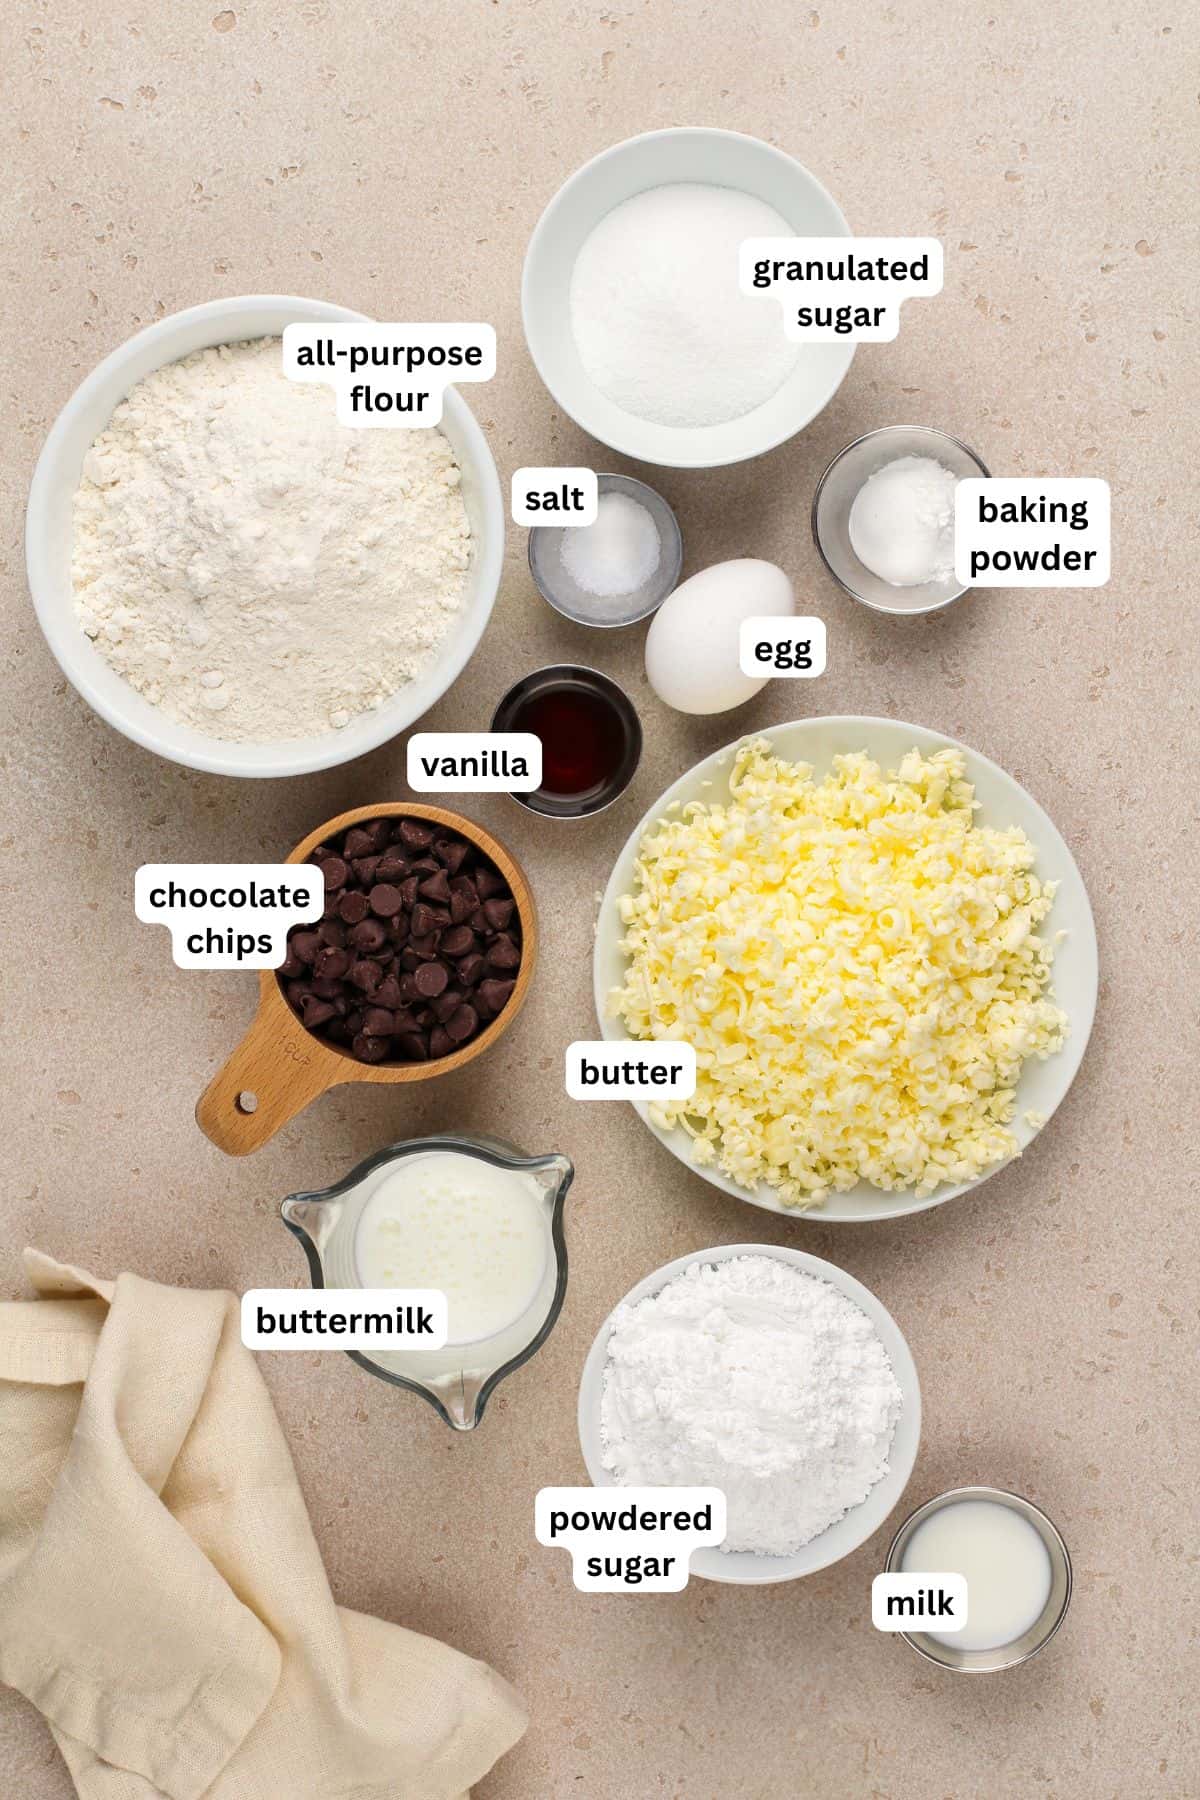
Key Ingredients
If you’re an avid baker, you probably already have everything you need to make these simple scones. Scroll down to the recipe card below for the full ingredient list and exact amounts!
- Flour: It’s best to spoon the flour into the measuring cup. If you dunk the cup into the bag, you end up really packing the flour in there.
- Baking Powder: Always double check the label and make sure it’s not expired! If it’s outdated, it won’t be potent enough to get the job done.
- Butter: Since you’ll be grating it, the butter should be frozen solid or VERY cold! This is super important to getting the perfect texture.
- Buttermilk: Heavy cream also works well for brushing the tops of the scones to create that perfectly golden finish. Use whichever you have on hand.
- Chocolate Chips: I think 1 cup is the perfect amount to get chocolate in each bite. Of course, feel free to measure with your heart. An extra sprinkle of chocolate chips never hurt anybody! You can also use a chocolate chunks, or a chopped up chocolate bar, for larger chocolate pieces.

How to Make Chocolate Chip Scones
You’re going to love how easily these homemade chocolate chip scones come together! Below is a quick recipe overview, but please scroll down to the recipe card for full instructions.
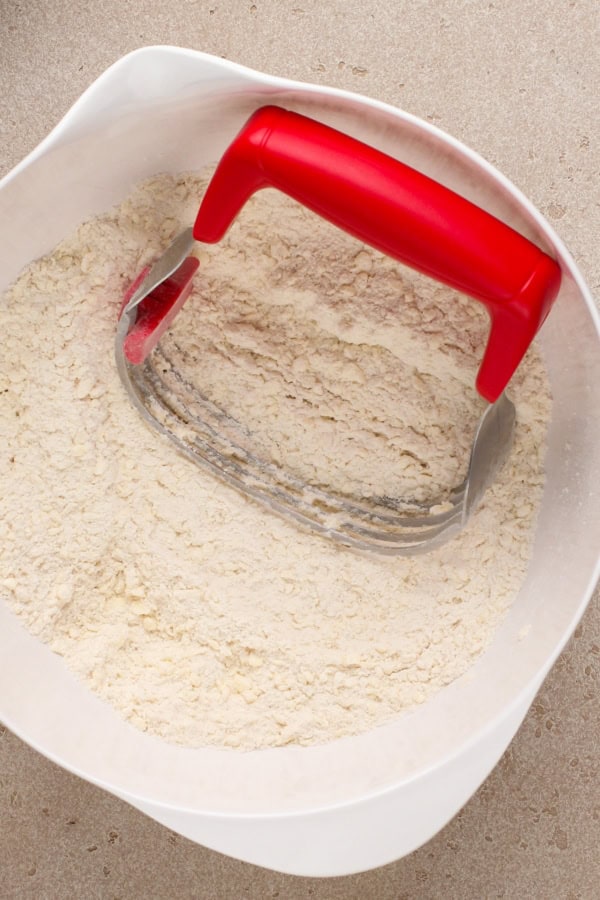
- Mix the First Few Ingredients: Whisk together flour, sugar, salt and baking powder. Add in the butter – I like to use a pastry cutter for this step, but you can also use a large fork. You can also use your hands, but warm hands will warm the butter and can change the final texture of your scones.
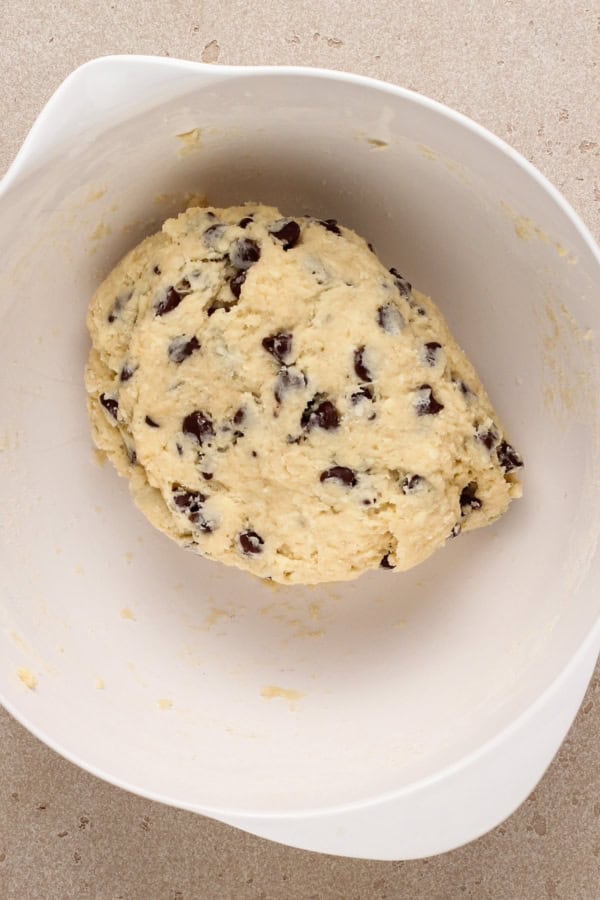
- Form the Dough: Whisk together egg, buttermilk, and vanilla. Combine the wet and dry ingredients, with the chocolate chips, until the dough is formed and holds together in a ball.
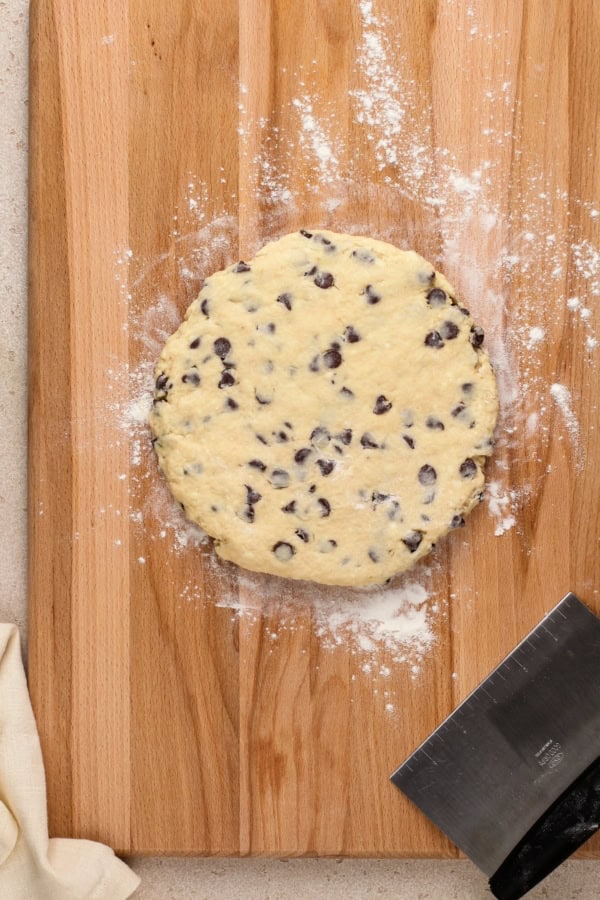
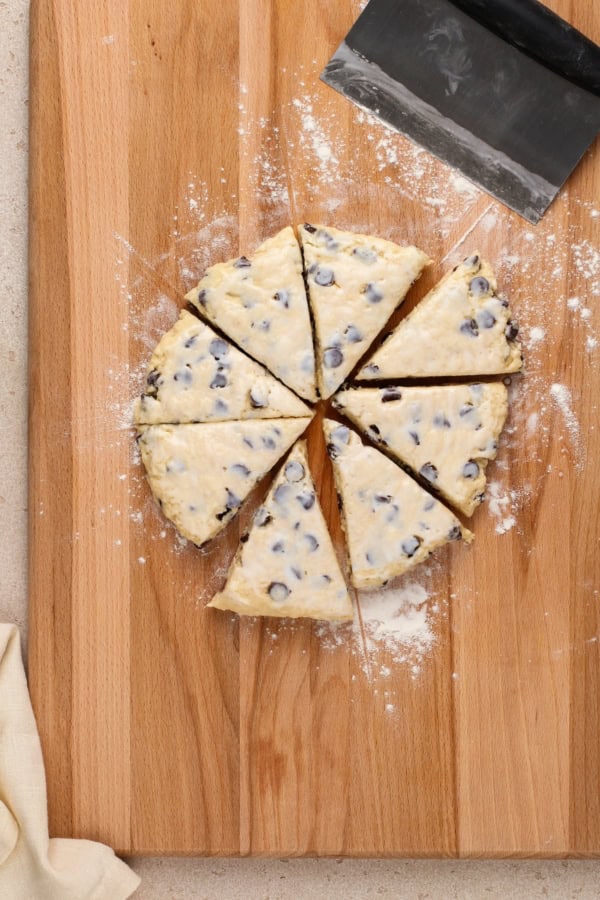
- Roll the Dough: Press the scone dough into a circle on a floured surface. Brush the top with buttermilk or heavy cream to get that golden crisp finish.
- Slice: Cut the circle into 8 even slices. You can also cut the dough into smaller portions for bite-sized treats, perfect for brunch platters or tea parties.
Want to save this recipe?
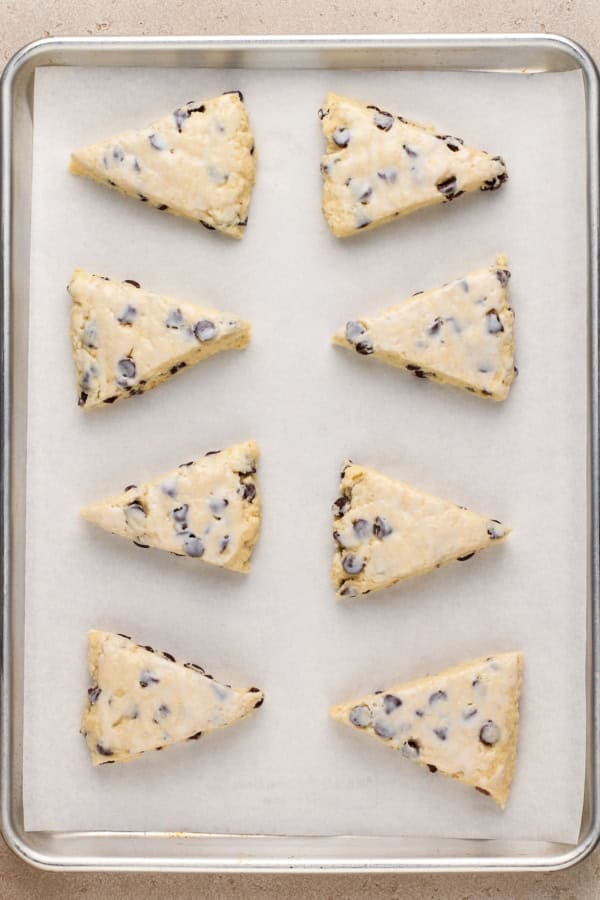

- Chill: Let the scones chill in the fridge for about 20 minutes prior to baking. This step is so important for flaky, layered scones with a tall rise – don’t skip it!
- Bake: Bake for 20 minutes or until deliciously golden brown. A hot oven (400°F) helps scones rise quickly and develop a crisp exterior. You can serve them as is, or add a little glaze on top of sweeten them up!

Chef’s Tips & Variations
- Chill the Dough: Warm dough spreads in the oven, leading to flat scones. Chilled dough holds its shape better for a taller scone.
- Extra Cold Butter: It’s super important to use very cold butter. It creates pockets of steam as the scones bake, resulting in a light and flaky texture. You can even use frozen butter, grating it directly into the flour.
- Don’t Over-Mix: If you beat the dough too much, you’ll end up with flat, dense scones. Make sure everything is well combined, but don’t go overboard!
- Add Ins: There’s wiggle room for creativity here. Along with your chocolate chips (which can be milk, dark, or semi-sweet), you can toss in a sprinkle of chopped nuts, fresh orange zest, shredded coconut, or even some dried cherries!

Prepare Chocolate Chip Scones In Advance
If you don’t want to bake all the chocolate chip scones at once, freeze the extras and bake them straight from the freezer for fresh scones anytime.
- Refrigerate Dough: Prep the scones, but do not bake them. Instead, wrap the cookie sheet tightly, and store it in the fridge for up to 24 hours. Bake fresh when ready.
- Freeze Dough: Place sliced unbaked scones on a baking sheet and freeze until solid, then transfer to a freezer bag and freeze for up to 3 months. Bake straight from frozen, adding a few extra minutes to the baking time.
Chocolate Chip Scones
Ingredients
- 2 cups all-purpose flour
- ⅓ cup granulated sugar
- ½ teaspoon salt
- 1 tablespoon baking powder
- ½ cup (1 stick) unsalted butter, grated and very cold or frozen
- ½ cup buttermilk or heavy cream, plus more for brushing on top
- 1 large egg
- 2 teaspoons vanilla extract
- 1 cup chocolate chips
Optional Icing
- 1 cup powdered sugar
- 1 to 2 tablespoons milk, or water
- 1 ½ teaspoons vanilla extract
Want to save this recipe?
Instructions
- In a large bowl, whisk together flour, sugar, salt and baking powder. Using a pastry blender or your hands, cut in butter until mixture is crumbly.
- In a small bowl, whisk together egg, buttermilk and vanilla extract. Add liquid ingredients and chocolate chips to dry ingredients and stir until moistened, and mixture is well combined and holds together in a ball.
- Sprinkle a small amount of flour onto parchment paper or counter. Press dough into 8 inch circle, about ¾ inch thick. Brush top with additional buttermilk.
- Using a sharp knife, cut circle into 8 wedges. Divide triangles and place on a baking sheet lined with parchment paper or a silicone baking mat, leaving enough space for the scones to expand when cooked.
- Place scones in refrigerator for 20 minutes. While scones chill, preheat oven to 400°F.
- Bake scones for 20 to 25 minutes or until golden brown. Remove from oven and cool slightly.
- In a small bowl, whisk together powdered sugar, milk and vanilla extract – until smooth. Drizzle the tops of each scone generously with vanilla glaze.
- Serve warm or let cool completely to room temperature and store in airtight container at room temperature for up to 3 days.
Notes
Video
Nutrition
Categories:
More of the Best Sweet Breakfast Recipes
Post may contain affiliate links. Read my disclosure policy.










Thank you for all of the helpful tips! My first time making scones and they turned out perfectly.