
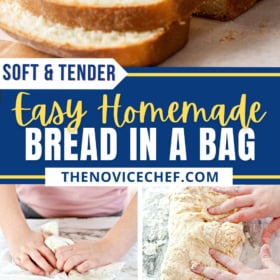
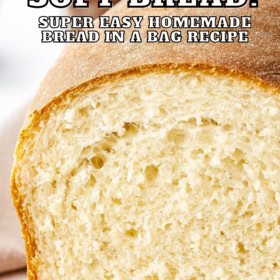
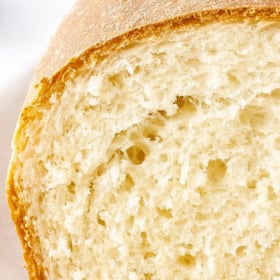
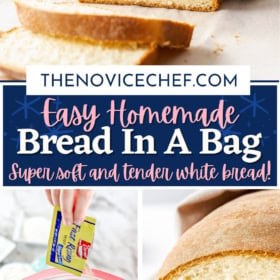
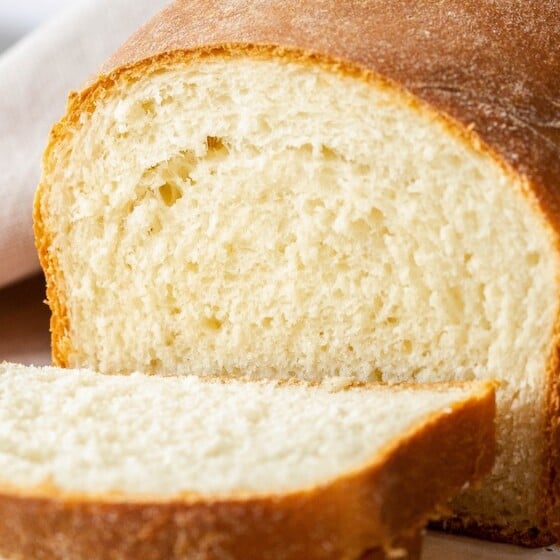
This homemade sandwich bread recipe uses a plastic ziplock bag to make perfect, extra soft, white sandwich bread every time. It is so simple to make, even the kids will love helping!

Is it just me, or does nothing make a home smell better than bread baking in the oven?
With this simple method for “bread in a bag,” you will be wondering why you haven’t made bread at home before! This recipe is so easy and my kids love to help making it. The finished bread makes the best PB&J sandwiches, not to mention every other kind of sandwich you can think of.
Why I Love Making Sandwich Bread
- No special equipment needed: Whether you want a nice slice of bread to go with dinner, or something cozy to welcome visitors, this recipe creates a perfectly soft loaf without a bread maker.
- Very little clean up: Since this recipe does not require any special machines (bread maker, stand mixer, hand mixer, etc), there is very little clean up needed. If you use the ziplock bag instead of a bowl, there is even less to clean!
- Milk instead of water: This bread recipe uses milk instead of water. The fat in the milk makes the bread more tender and gives the bread a better flavor than using just water. Milk also has natural sugar in it, which helps the yeast grow and makes the bread a perfect after school snack bread – tasty, warm and homemade!
- Customizable: This bread is a great base recipe for different flavors of bread. If you wanted to, you could add raisins and cinnamon when you roll the bread before the final rise. Or how about some fresh herbs like rosemary or thyme.

What Equipment Do I Need?
This is an easy bread recipe that doesn’t require any fancy equipment. Here’s what you’ll need:
- Gallon Size Resealable Plastic Bag: If you don’t have a ziplock bag, you can use a bowl if you prefer.
- Rolling Pin
- Loaf Pan: You will need a 9×5 loaf pan for baking the bread.
- Tea Towel: A thin/light weight kitchen towel to cover the bread while it rises.
- Thermometer: I use a candy thermometer that clips to the side of the pan, to make sure you heat your milk and oil to the correct temperature.
You will also need a place to roll out the dough, like on your counter top or a cutting board.
Simple Ingredients
- Flour: I use regular all-purpose flour. You can also use bread flour. Bread flour has a higher percentage of protein which makes the crumb a little tighter. All purpose flour will create a softer bread.
- Yeast: For this recipe, I recommend using an instant yeast. Depending on the brand, it can be labeled as fast rising, instant yeast, rapid rise yeast, or fast acting yeast. Add it straight from the package to keep things easy.
- Granulated Sugar
- Salt
- Whole Milk: I recommend using whole milk for the higher fat content, which in turn creates a richer taste and softer crumb. However, you can use 2% or fat free milk. If you only have water, you can use that instead.
- Vegetable Oil: Olive oil would also work just fine.
How To Make Homemade Sandwich Bread
If this is your first time making bread, don’t be nervous! I promise this recipe is super simple and I will walk you through it step by step. For a printable set of instructions with even more detail, scroll to the bottom of this post.


- Combine the dry ingredients: In a 1-gallon resealable plastic bag, combine yeast, sugar, salt and 1 cup of flour. Seal bag and shake to combine.
- Warm the milk and oil: In a small saucepan, heat the milk and oil until it reaches 110°F to 115°F degrees. It should NOT boil – you can touch the liquid at this point, but it should be warm to the touch. You do not want to kill the yeast with too hot of liquid.
- Combine: Open the zip-top bag and pour the warmed milk and oil into the bag. Reseal the bag and use your hands to work the bag to combine the ingredients.
- Add flour: Add the flour, about ½ cup at a time, working the bag with your hands between each addition, until a soft dough forms and pulls away from the sides of the bag.


- Knead the dough: Sprinkle a clean countertop generously with extra flour and remove the dough from the bag. Knead the dough on the counter for 5 minutes until the dough is smooth and elastic.
- Rest: Cover the dough with a clean kitchen towel and let it rest for 10 minutes.
- Roll: Using a rolling pin, roll the dough into a 12×7-inch rectangle. Beginning from one short end, roll the dough up tightly into a log.
- Rise: Place the dough into a 8.5 x 4.4 inch loaf pan greased with non-stick cooking spray. Cover with a clean kitchen towel and set aside in a warm place to rise until doubled, about 1 hour.
- Bake: Bake the bread at 375°F for 30 minutes or until done. Cool the bread for 5 minutes in the pan, then remove and cool completely on a wire cooling rack.

Helpful Tips
- Warm Space For Rising: The best place to let dough rise is a warm area in your home. On a warm day, your kitchen counter will probably work just fine. My mom used to let our bread dough rise in the laundry room when the dryer was going to help warm the room. If your kitchen is cold, your oven is actually a great place. Preheat your oven to 200°F for 1-2 minutes to get it nice and toasty, then turn it off and add your dough to rise inside the oven. Some ovens also have a “proofing” setting.
- Butter The Top: While it is still warm, allow a tablespoon of butter to melt over the top of the crust. Do this before cutting the homemade bread and you will barely need any butter when you slice into it! It will absorb a little and the taste goes a long way.

How To Store Sandwich Bread
Homemade bread is best that first day, with a crispy crust and perfectly soft center. However, if stored properly, it will stay delicious for 3 to 4 days.
- To store: Wrap the bread in foil, or place it in an airtight container. Store it at room temperature. It’s important to store your bread in something air tight to maintain the moisture in your bread. The bread will lose the crisp outside and become softer as the moisture in the bread moves towards the surface. If you like the crisp edges, you can always toast it lightly before serving.
- Can I freeze it? You sure can. Make sure the bread is completely cooled. Wrap it with saran wrap and then place it in a freezer friendly ziploc bag. Freeze for up to 6 months. Thaw by placing on the counter at room temperature for several hours.
More Easy Bread Recipes
- Homemade Hot Dog Buns
- Soft Dinner Rolls
- Homemade Crescent Rolls
- Brioche Buns
- Homemade Hawaiian Rolls
- Copycat Texas Roadhouse Rolls
- Homemade Soft Pretzels
Homemade Sandwich Bread
Ingredients
- 2 ½ to 3 cups all-purpose flour
- 1 envelope, .25 ounce or 2 ½ teaspoons fast acting dry yeast
- 3 tablespoons granulated sugar
- 1 teaspoon salt
- 1 cup whole milk
- 3 tablespoons vegetable oil
Want to save this recipe?
Instructions
- In a 1-gallon resealable plastic bag, combine yeast, sugar, salt and 1 cup of flour. Seal bag and shake to combine.
- In a small saucepan, heat the milk and oil over medium-high heat, until it reaches 110°F to 115°F degrees on a thermometer. It should NOT boil – you can touch the liquid at this point, but it should be warm to the touch. You do not want to kill the yeast with too hot of liquid.
- Open the zip-top bag and pour the warmed milk and oil into the bag. Reseal the bag and use your hands to work the bag to combine the ingredients.
- Add the flour, about ½ cup at a time, working the bag with your hands between each addition, until a soft dough forms and pulls away from the sides of the bag.
- Sprinkle a clean countertop generously with extra flour and remove the dough from the bag. Knead the dough on the counter for 5 minutes, with your hands. Add additional flour as you knead, just until the dough is smooth and elastic.
- Cover the dough with a clean kitchen towel and let it rest for 10 minutes.
- Using a rolling pin, roll the dough into a 12×7-inch rectangle. Beginning from one short end, roll the dough up tightly into a log.
- Place the dough into a 9×5 inch loaf pan that has been greased with non-stick cooking spray. Cover with a clean kitchen towel and set aside in a warm place to rise until doubled, about 1 hour.
- Bake the bread at 375°F for 30 minutes or until done. Cool the bread for 5 minutes in the pan, then remove and cool completely on a wire cooling rack.
⭐️ Tried this recipe? Leave a comment and rating! It only takes a minute and helps support our family-run blog. ❤️
Notes
Video
Nutrition
Categories:
Test Kitchen Review
Post may contain affiliate links.

Great recipe!
Can 2% milk be used in place of whole? I no longer drink whole.
Or water -I made bread every day at my work and we used water
Yes you can use 2%!
Could you use almond flour instead of regular flour
Hi Debbie, usually it is not a direct 1:1 swap, but I am not an expert on gluten free baking. I’d recommend searching a gluten free homemade bread recipe using almond flour to guarantee your success. I’d hate for you to waste ingredients!
Could this recipe be used to make rolls instead of a loaf of bread?
Sure! Just shape them as rolls, let them rise and bake!
Just what I was looking for. Thank you,
.
Any suggestions for gluten free flour substitutions? Thanks!
Hi Anna! I apologize, but I am not a gluten free baker and I do not specialize in it. I wouldn’t want to steer you wrong or have you waste ingredients, so I would recommend searching for a gluten free bread recipe to make sure you get a recipe that will work for you!
Using this recipe, could you do a sugar/cinnamon sprinkle before rolling up to put in the loaf pan?? Maybe some raisins to make cinnamon raisin bread?? Fresh baked bread is one amazing smell, but add that cinnamon smell and you have raised the bar!!!
Of course! Sounds delicious!
Could Instant Yeast be used in this recipe??
Hi Donna, yes instant yeast will work as well!
Can you use fat free skim milk. Also would this work with gluten free flour
Hi Judi! Yes, you can use fat free skim milk. Whole milk will give the bread a little better flavor/texture, but skim milk is definitely fine to use as well. I am not well versed on gluten free baking, I only have a general understanding. I would recommend searching for a gluten free bread recipe instead. I would hate for you to possibly waste ingredients.
I was wondering if you have a recipe like this to make sourdough bread
Hi Holly! I don’t yet, but I am working on testing my sourdough recipe to try to get it perfect to share. Hopefully soon! 🙂
Hi can you use wholemeal or rye flour. Thanks
Hi Sam, I personally do not have any experience with Rye flour. I have used wholemeal flour a few times, but don’t think it would be great in this recipe. I would recommend looking for a bread recipe that specifically is made to use those flours. I would recommend checking out the recipe section on King Arthur Flour website. Good luck!
Can you any other oil, Olive oil, coconut oil, instead of Vegetable oil?
Yes!
Have you made with bread flour by chance, and if so how much leavening?
I made a loaf with AP yesterday and making a loaf today for my inlaws. I posted my pic on your Facebook page today. It is a phenomenal and easy bread recipe!! I have made many types, recipes using different yeasts and this is the best and easiest. I may try a little less sugar so more of an Italian style vs Paska sweet bread next time. If you have a thought, would appreciate.
Hey Erin! So glad you enjoyed it! You can use bread flour – bread flour has a higher percentage of protein so it gives your bread a more chewy quality! And yes, it will also work with a little less sugar, but you will need a little sugar to feed the yeast. Hope this helps! 🙂
Hi, Could buttermilk be used?
Hi Amanda! Yes, you can use buttermilk in place of the milk. Just know that buttermilk can cause yeast breads to rise slower, so be patient!
Hi Jessica, I made this bread using the bread machine and I must admit, it’s my family’s favourite now. To add on, I let abt 2 tablespoons of butter melt on the baked bread. It tastes soooooo good! Thanks for sharing.
Hi Uma , it wasn’t over cooked or to dry using bread machine ? I wanted to use it but thought the cooking time would be too long ? Thanks 🙂
I’ve been making bread for several years and this is as good as any I’ve ever made. I didn’t use the bag, just a bowl and wooden spoon. So easy and excellent texture.
Glad you enjoyed it Wilda!
Can I use whole wheat flour
Yes, but I would recommend doing 50/50 of whole wheat flour and all purpose flour!
This bread is so yummy, it turned out amazing! This turned out better and way softer than bread I make with my bread maker. The loaf is on the small side but that actually works perfectly for my family. It baked so beautifully (just like your sample one) I wish I could post a picture here but it won’t let me! Thanks for sharing this method!
So glad you enjoyed it Allie! I am working on getting a site redesign that will allow readers to share photos of their recipes!! 🙂
What non dairy milk would you recommend instead of whole milk? Soy? Oat?
You can use water instead! This recipe is traditionally made with water.