

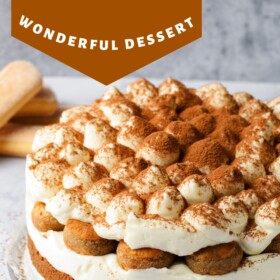
This rich and creamy Tiramisu Cheesecake is a super easy, no-bake recipe! It combines the best of two beloved desserts: Italian tiramisu, with its bold coffee and mascarpone flavors, and sweet, tangy cheesecake.

Sweet and Creamy Cheesecake, With a Tiramisu Twist!
One of my very favorite desserts is tiramisu. The first time I tasted this iconic chilled dessert, with its layers of coffee-dipped ladyfingers and sweet mascarpone cream, I was hooked! There’s a reason this sweet treat, lightly dusted with cocoa powder, is such a famous recipe: it’s practically irresistible.
Another dessert that no one can resist? Cheesecake. From a plain and simple version, to extra-rich New York style, to the unlimited fancy variations out there, cheesecake is always a winner!
So it really just makes sense to combine these two into one epic treat: a sumptuous, luscious, utterly indulgent no-bake Tiramisu Cheesecake. I’m going the no-bake route to cut down on the time and effort involved in making this dish. No-bake cheesecake is perfectly smooth, creamy, and rich, without the hassle of baking a traditional cheesecake batter in the oven.
What Does Tiramisu Mean?
Tiramisu literally means “pick me up,” or “cheer me up,” which makes total sense! With its triple-whammy flavor of coffee, creamy mascarpone, and cocoa powder, this recipe is guaranteed to make you feel better. Sometimes, a touch of alcohol or liqueur is added, such as Marsala wine, rum, or Kahlua, making it even more of a treat!
The List of Ingredients
So what will you need to make this easy cheesecake version of tiramisu? Actually, it’s a pretty straightforward list! You’ll need two kinds of cookies, some cream cheese and mascarpone, and a few other pantry staples. Here’s the complete list:
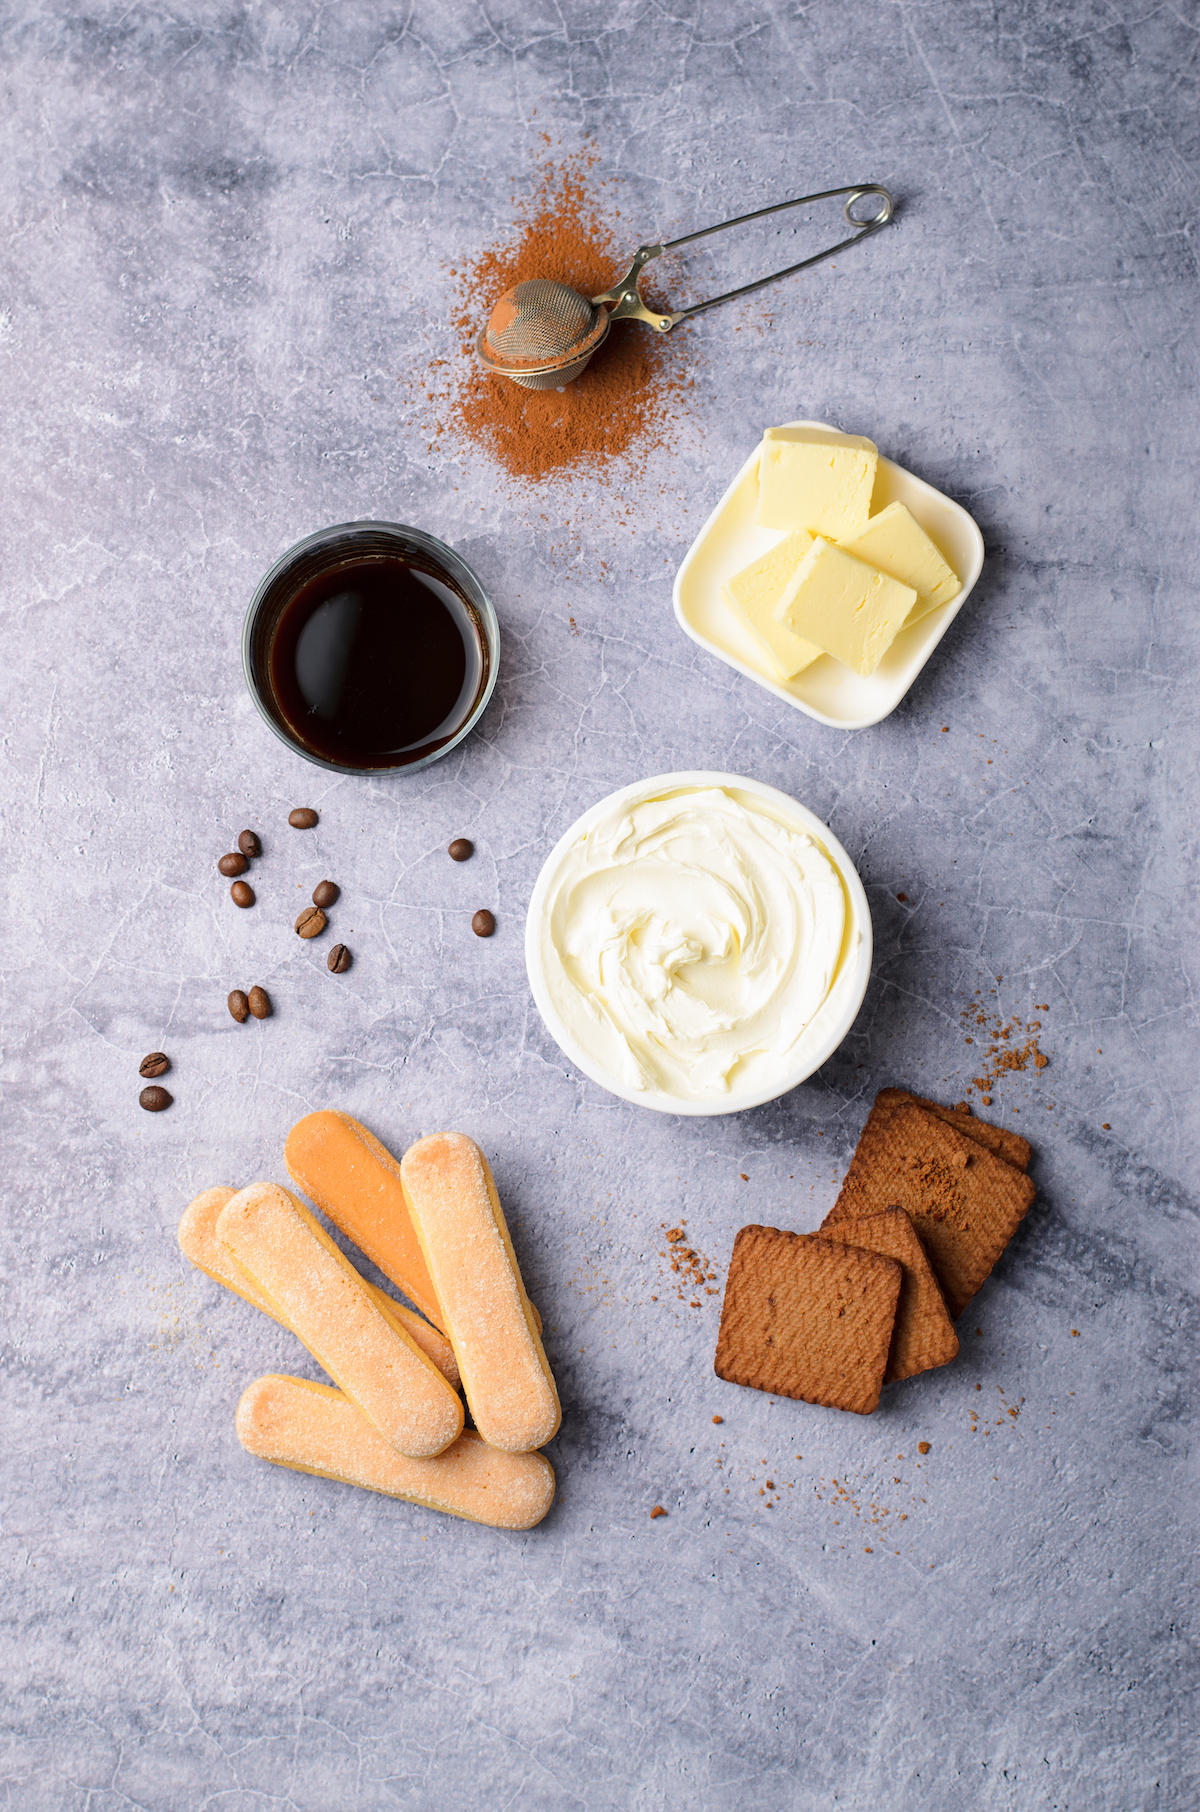
- Cookies for the Crust: I like to use chocolate wafer cookies for a nice chocolate-y crust, but you could also do a traditional graham cracker crust.
- Butter: Melted butter holds the crust together.
- Cream Cheese and Mascarpone Cheese: These two cheeses should be at room temperature.
- Powdered Sugar: To sweeten the cheesecake mixture.
- Vanilla: I like pure vanilla extract, or scraped vanilla bean.
- Heavy Cream: Homemade whipped cream is folded into the cream cheese and mascarpone cheese mixture, to lighten it and create the perfect cheesecake texture.
- Gelatin: A little bit of powdered gelatin is the secret to a stable, yet soft, no-bake cheesecake.
- Water: For dissolving the gelatin.
- Coffee: Brew and then chill half a cup of strong coffee.
- Liqueur: This is up to you – if you would like to include a liqueur, go with your favorite coffee-flavored liqueur. You could also use rum or other spirits of your choice.
- Ladyfingers: These are traditionally part of tiramisu, and are so good lightly dipped in the coffee.
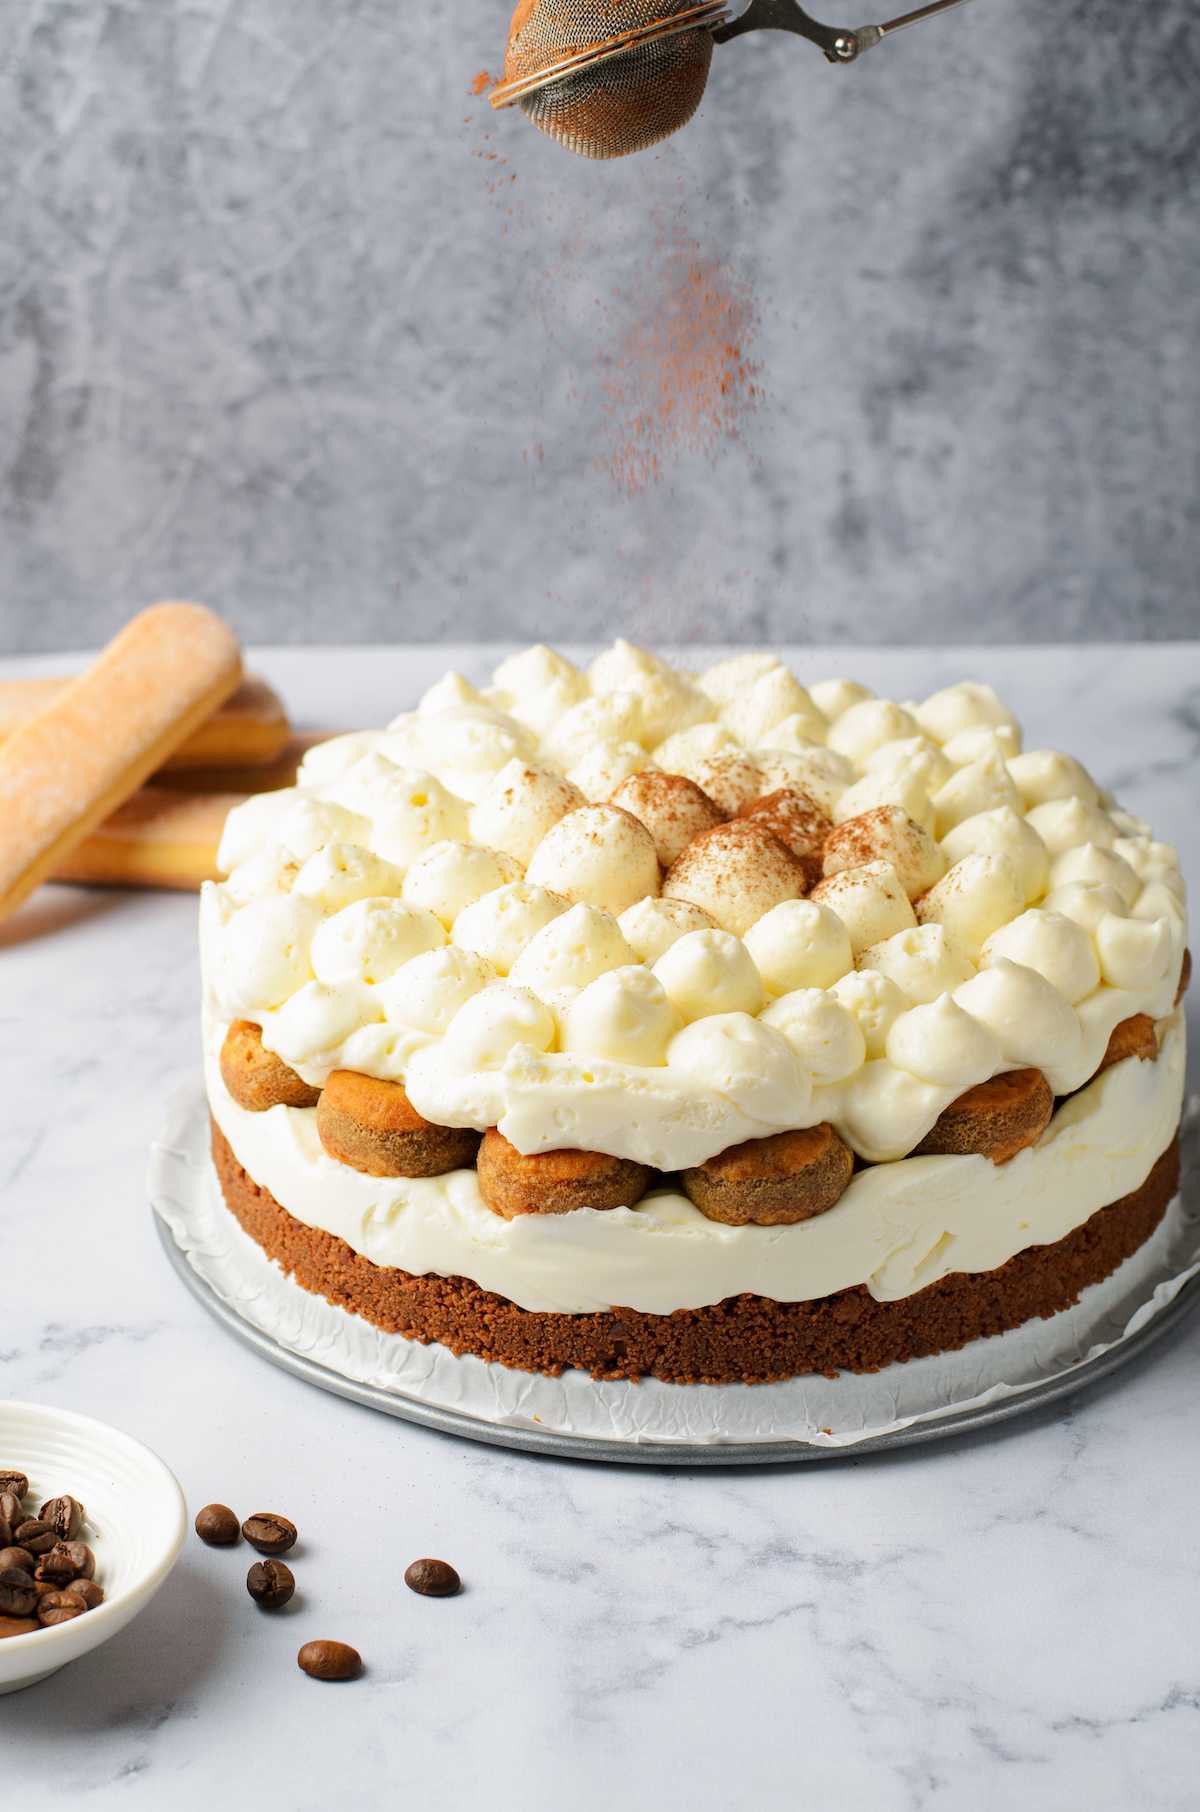
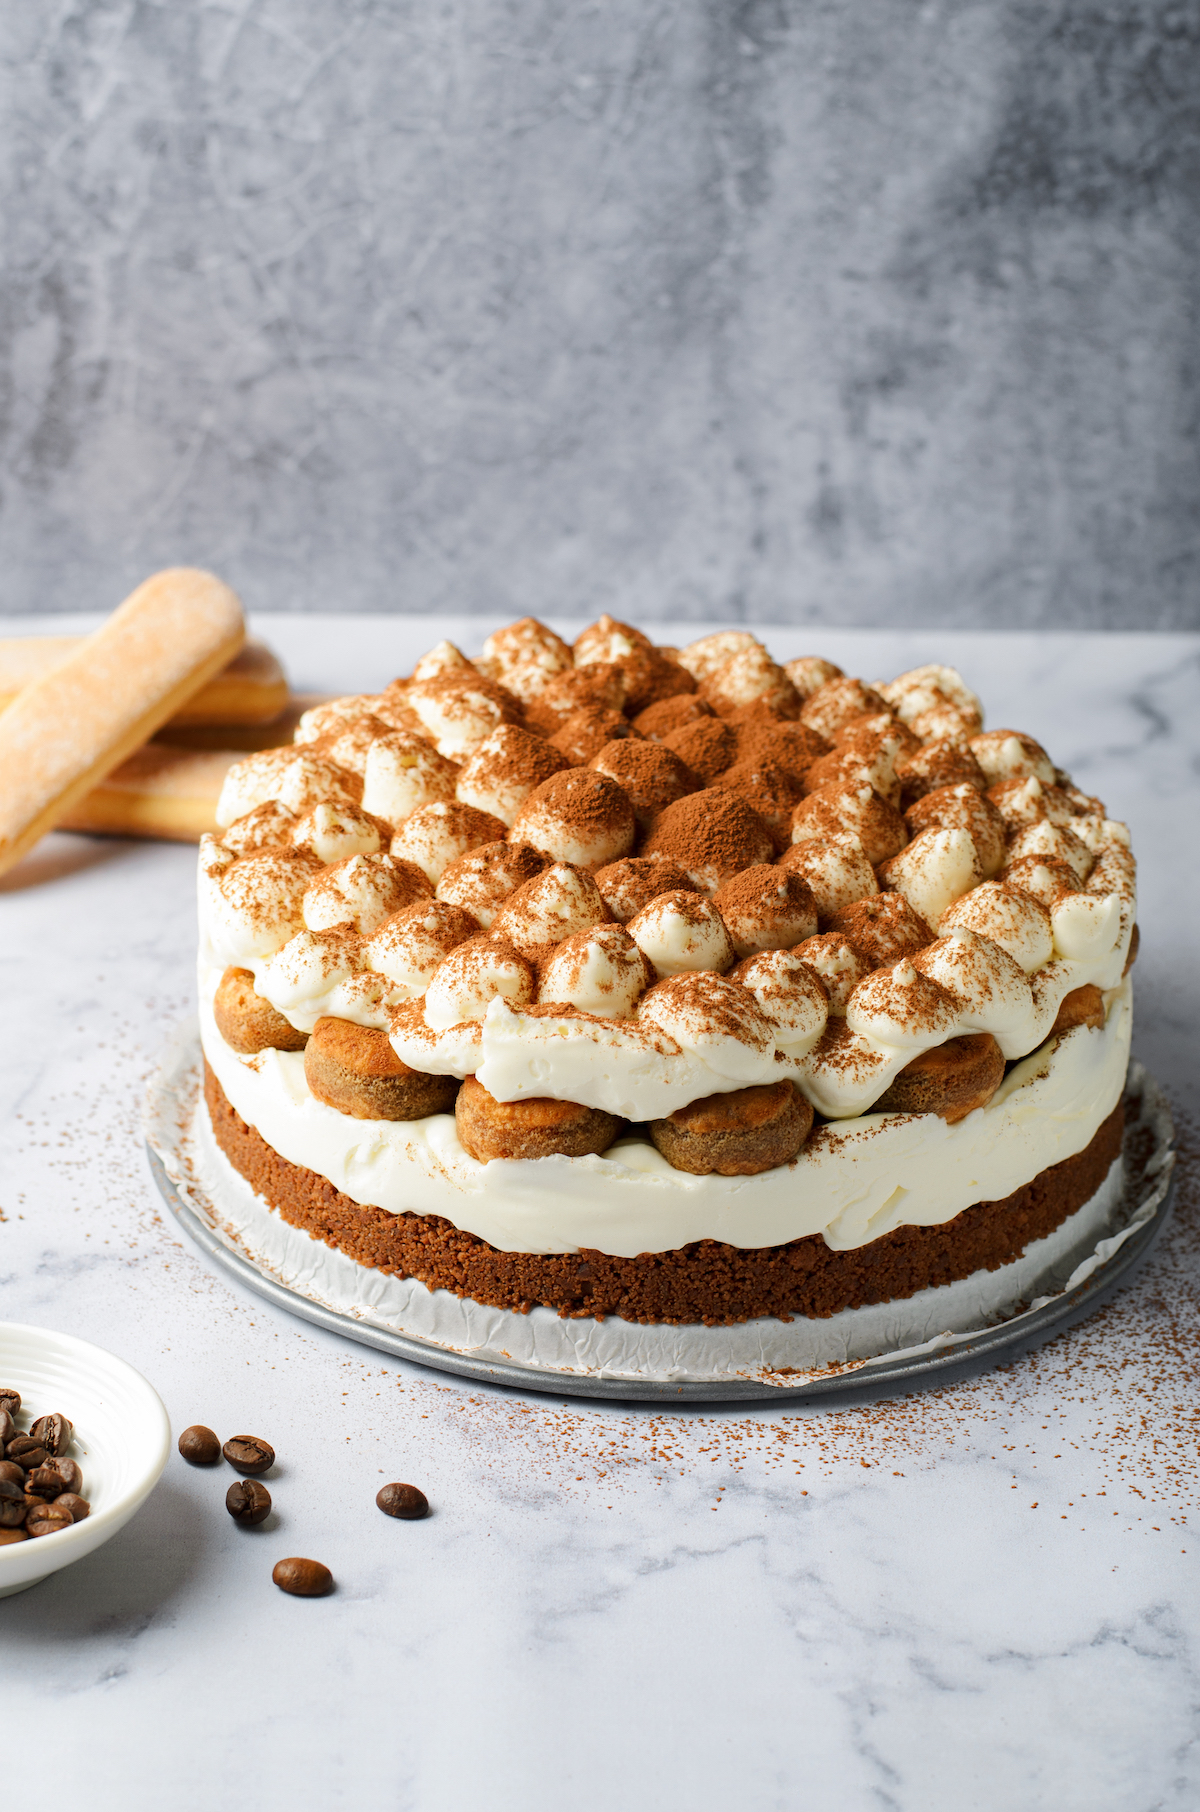
- Cocoa Powder: For dusting over the finished tiramisu cheesecake.

How to Make Tiramisu Cheesecake
Assembling this dessert is simple, but there are a few steps involved, so it’s a good idea to read through them once or twice and make sure you have everything you need, before you start making your tiramisu cheesecake. Here are the steps, in detail:
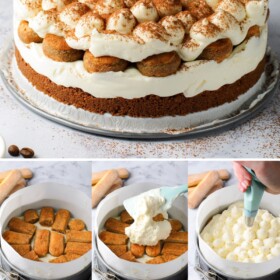
- Make the Crust. Pulse the chocolate wafer cookies in a food processor, until they are finely processed. Drizzle in the melted butter, and pulse again until the crumbs start to clump together. (You could also crush the cookies in a dish with the bottom of a glass, and then stir in the melted butter with a spoon or fork.) Line the bottom of a springform pan with parchment, and then press the crust mixture into it. Refrigerate for about 10 minutes.
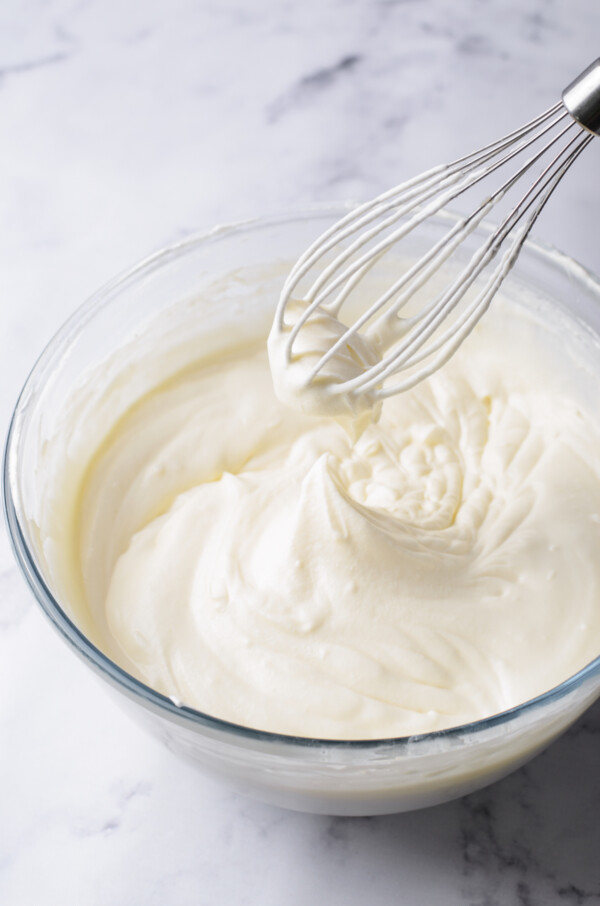
- Beat the Cheeses and Whip the Cream. While the crust is chilling, beat the cream cheese, mascarpone, powdered sugar, and vanilla together in a stand mixer or with a hand mixer, until the mixture is light and fluffy. Next, in a separate bowl, beat the heavy cream (which should be cold, right out of the fridge) until soft peaks appear.
- Make the Mascarpone-Cream-Cheese Filling. Carefully fold the whipped cream into the mascarpone mixture, until just combined. Then the gelatin and water together in a small bowl, and let it set for about 5 minutes to dissolve and thicken. Microwave briefly to finish dissolving the gelatin, but don’t let it boil in the microwave. Cool the gelatin, and then fold it into the filling. Don’t overmix the filling, or it may separate.
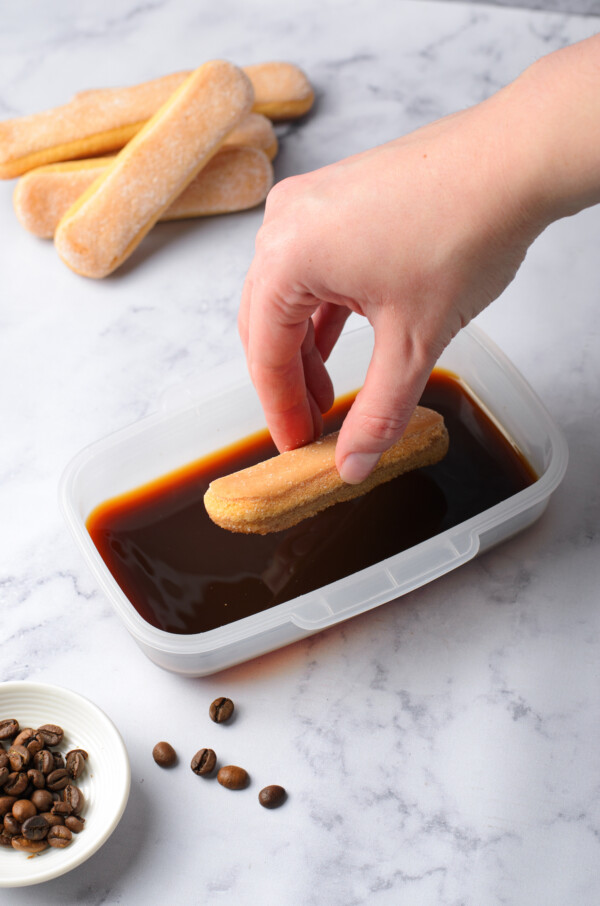
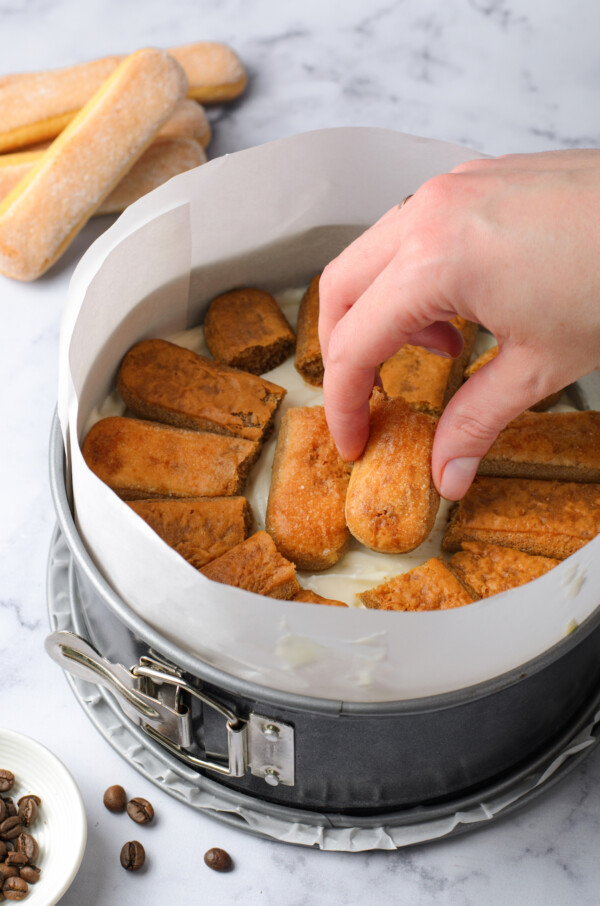
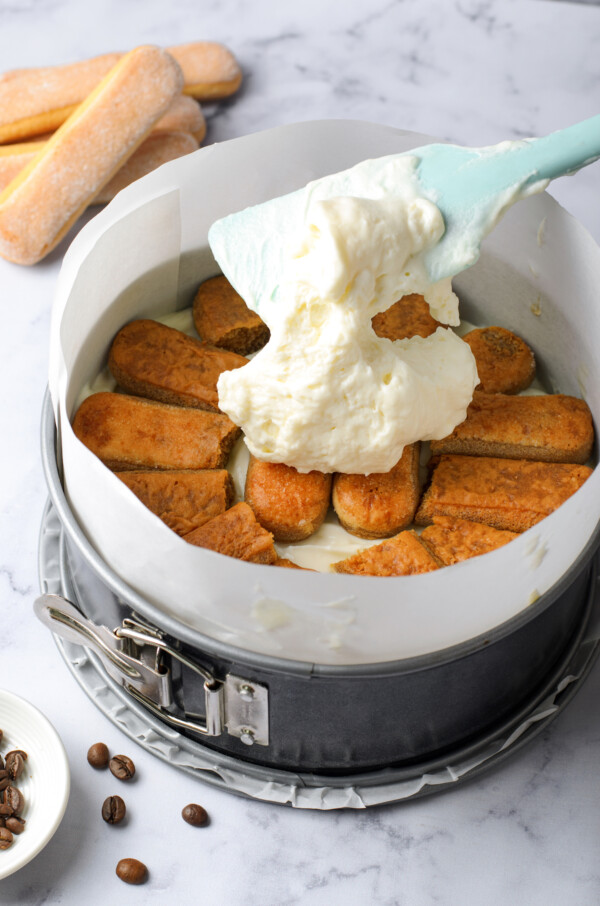
- Assemble the Tiramisu. Set out your chilled coffee, and stir in the liqueur or rum (if using). Set out the ladyfingers as well, and take the cookie crust out of the refrigerator. Spread ⅓ of the cheesecake mixture over the crust. Dip the ladyfingers into the coffee mixture, one at a time, and lay them on top of the cheesecake. Then spread another ⅓ of the filling over the ladyfingers.
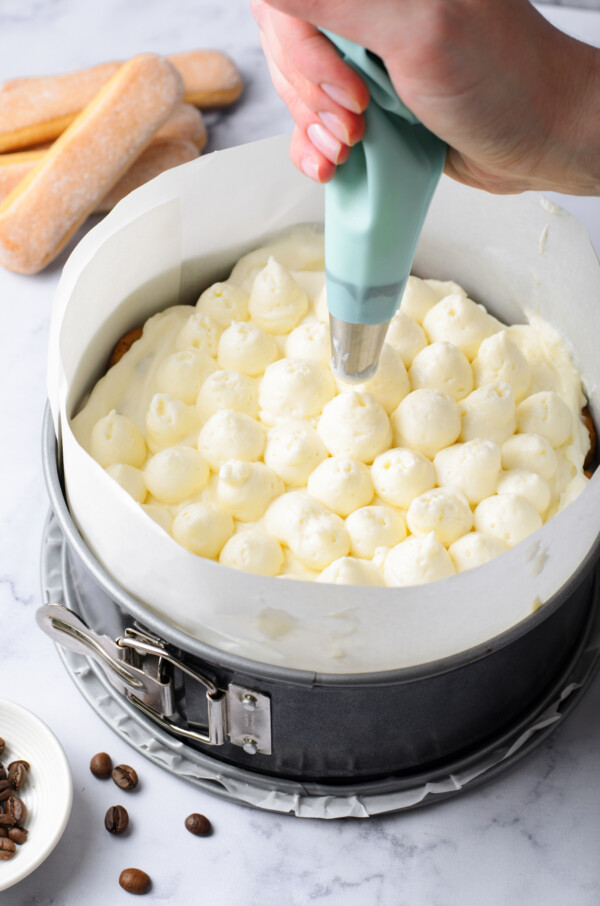
- Pipe the Top Layer: Fill a piping bag with the rest of the cream cheese filling, and fit on the tip. Pipe stars, rosettes, or whatever you like on top of the cake.
- Chill. Cover and chill the tiramisu cheesecake in the fridge, for at least 3 hours, or overnight.
- Enjoy! I When you’re ready to serve this, carefully remove the cheesecake from the pan. Dust the top of the with cocoa powder, and serve.
Tips for Success
My favorite tips for making this recipe in your own kitchen involve using the right coffee, the right temperatures, and the right serving technique.
- Coffee: I make my tiramisu with strong brewed coffee, but you could also use espresso, or even strongly-brewed decaf.
- Temperature: To whip up properly, the cream cheese and mascarpone need to be softened to room temperature. However, keep your heavy whipping cream in the refrigerator until the last minute.
- To Serve: When it’s time to serve the cheesecake, use a hot knife to do so. Dip the knife in hot water, and wipe it clean before cutting.
Yummy Variations
You can do a lot with tiramisu, and cheesecake is also a versatile recipe – so feel free to tweak this combination dessert. Make changes that work for you! Here are a couple of examples for inspiration:
- Chocolate: Instead of cocoa powder, top this cheesecake with chocolate sauce and chocolate shavings, for an ultra-rich chocolate taste.
- Caramel: Drizzle layers of caramel sauce over the ladyfingers, and over the top of the cheesecake, before piping the rosettes.
- Hazelnut: Substitute hazelnut liqueur for the rum. Easy and scrumptious.
How to Store Leftover Cheesecake
Refrigerate your leftover tiramisu to keep it fresh, sturdy, and safe to eat. Stored in an airtight container, it will keep for up to 5 days.
Can I Freeze This Recipe?
Yes, you can also freeze this! After the cheesecake is fully set, wrap it in a layer of plastic wrap, followed by a layer of foil. Freeze for up to 3 months. Thaw in the refrigerator before serving.

Tiramisu Cheesecake Recipe
Ingredients
- 14 chocolate wafer cookies
- ⅓ cup butter, melted
- 10 ounces cream cheese, room temperature
- 8 ounces mascarpone, room temperature
- 1 ¼ cups powdered sugar
- 1 teaspoon vanilla extract
- 1 cup heavy cream
- 1 tablespoon powdered gelatin
- ¼ cup water
- 4 ounces strong coffee, chilled
- 2 tablespoons coffee-flavored liqueur or rum, if desired
- 10 – 12 ladyfingers
- 2 tablespoons cocoa powder
Want to save this recipe?
Instructions
- Place the chocolate cookies into a food processor and pulse until a fine consistency. Drizzle in the melted butter and process until the crumbs start to clump together.
- Cover an 8 – inch springform cake pan with parchment paper. Press down the crumbs into the pan, and place in the fridge for 10 minutes.
- Meanwhile, beat the cream cheese, mascarpone, powdered sugar, and vanilla together in a large bowl, until light and fluffy.
- Beat the cold heavy cream until soft peaks appear. Fold the whipped cream into the mascarpone mixture until just combined.
- Mix the gelatin and water. Let stand for 5 minutes. Microwave the gelatine until it dissolves, but do not boil. Set aside to cool.
- Add the cooled, dissolved gelatin to the bowl of tiramisu filling. Mix until just combined. Do not overmix.
- Remove the cookie base from the fridge. Spread ⅓ of the tiramisu filling over the crumbs.
- In a small bowl, add the coffee-flavored liqueur or the rum to your strong coffee. Dip the ladyfingers into the coffee mixture, one at a time. Then add to the springform pan. Break the cookies to fit, as needed.
- Spread another ⅓ of the filling mixture over the ladyfingers.
- Transfer the remaining tiramisu filling into a piping bag, and pipe on top of the cake to make a decorative topping as desired.
- Set the cheesecake in the fridge to chill for at least 3 hours, or overnight.
- To serve, carefully remove the cheesecake from the pan. Dust the top of the cheesecake with cocoa powder, slice, and serve!
⭐️ Tried this recipe? Leave a comment and rating! It only takes a minute and helps support our family-run blog. ❤️
Notes
Nutrition
Categories:
More Decadent No-Bake Desserts
- Lemon Pudding Trifle
- No Bake Chocolate Eclair Cake
- Summer Berry Icebox Cake
- Rocky Road Fudge
- Reese’s Peanut Butter Pie
- Easy Banana Pudding
- No Bake Chocolate Eclair Cake
- Rolo Ritz Marshmallow Treats
Post may contain affiliate links. Read my disclosure policy.

Don’t have an 8-inch springform…will a 9-inch do? Thanks…
Hi Liz! Yes it will work!