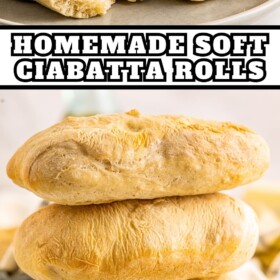

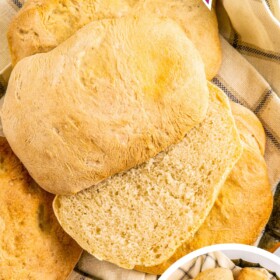
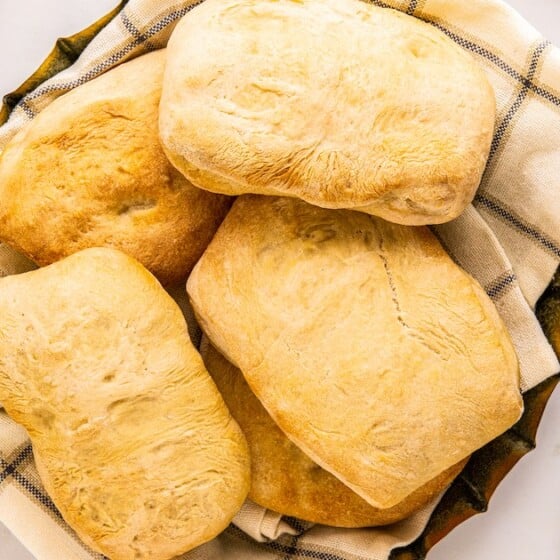
Make light, airy, and chewy ciabatta rolls! Baked to a lovely golden brown, these rolls are deliciously crusty outside, and soft and tender inside. They’re perfect for sandwiches or serving with bruschetta!

Why I Love This Ciabatta Rolls Recipe
If you love crispy, chewy bread with a light, soft texture inside, these homemade ciabatta rolls are calling your name. Ciabatta is traditional Italian bread, often served as gourmet sandwiches or sliced and topped with tomatoes to make bruschetta. This easy recipe shows you how to make ciabatta rolls that are individually-sized, and perfect for storing. Plus, you get even more of that delicious, golden, crusty exterior! These bread rolls are:
- Budget-Friendly. I make these ciabatta rolls with flour, yeast, and salt. There are no fancy ingredients, and they’re very budget-friendly.
- Simple to Make. If you are a bit intimidated by the thought of making dinner rolls, don’t be! These are so simple. Handling the soft, sticky dough is different than handling other bread doughs, but a bench scraper and the right technique are all you’ll need.
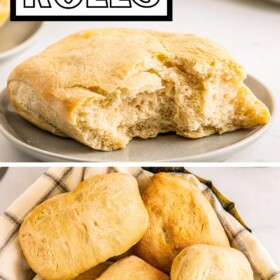
- Prefect Texture. The interior of these rolls is light, airy, and beautiful, while the outside has the perfect, signature chewy bite.
- Versatile. You can use ciabatta rolls for almost any meal that calls for sandwich bread or dinner rolls.
Homemade breads are such a joy to bake and eat, aren’t they? If you’re looking for more easy bread recipes and dinner rolls, check out my homemade sandwich bread, fluffy potato rolls, and these copycat Texas Roadhouse rolls, next!

What Makes Ciabatta Different from Other Breads?
Ciabatta is a yeasted bread known for its texture. This bread has a chewy, well-baked outside, similar to other artisan breads, but the inside is where the magic is: Ciabatta bread is light and airy, and unique because of its holes throughout. To get that texture, the outside of the dough needs to be sprayed with water before baking, or steamed in the oven.
The dough is also moist and sticky from the starter and water in the recipe. That can make it a bit daunting if you’re used to drier, easy-to-handle dough like plain bread dough. However, don’t be intimidated! It’s easier than it seems, and the results are well worth the effort.

Key Ingredients
Classic soft dinner rolls and brioche buns use what’s called rich dough. Meanwhile, these ciabatta bread rolls are made with lean dough. The difference is that rich dough contains fats, sugar, and eggs, while lean dough is lower in fat, and chewier as a result.
This ciabatta recipe needs very few ingredients, beginning with a starter made from flour, yeast, and water. I go over what you’ll need for the starter and bread below. Scroll down to the recipe card for a printable list with the full recipe amounts.
- Flour and Water: You can use plain, all-purpose flour for the bread starter and the dough. You’ll also need water to make the starter.
- Yeast: I make this bread with active dry yeast. Like the flour, you’ll need some for the starter and some for the dough.
- Salt: Kosher salt or another mild salt is best.

How to Make Ciabatta Rolls
These ciabatta rolls begin with a starter, similar to sourdough. Using a starter is key to the bread rolls’ flavor and rise, and it does mean that you’ll need to start this recipe the night before. But don’t worry, it’s SUPER simple. I go over the steps to make the rolls here from start to finish, with photos. Be sure to scroll to the printable recipe card after the post for the full recipe details.
Make a Bread Starter
The goal of a bread starter is to start fermentation, which breaks down the carbohydrates in the flour and acts as natural leavening in bread recipes. This is what gives your ciabatta those big, beautiful pockets of air throughout the crumb, so don’t skip it! It’s very easy to make:


- Mix the starter ingredients. The night before making your rolls, whisk flour, water, and yeast together in a bowl. Make sure the bowl is large enough to account for the starter bubbling up overnight.
- Rest. Cover the bowl with plastic wrap. Then, leave it to sit out on the counter overnight. It should be nice and bubbly the next day.
Make the Dough
Fast forward to the following day, and you’re ready to make your ciabatta rolls:


- Mix the dry ingredients. Add flour, yeast, and salt to the bowl of your stand mixer. Use the hook attachment, since we’ll be kneading dough, and give the ingredients a stir to combine.
- Add the wet ingredients. Next, add the starter from the night before, along with water.


- Knead the dough. Now, knead the dough ingredients together for 10 minutes. The dough will be very sticky, but that’s what we’re going for!
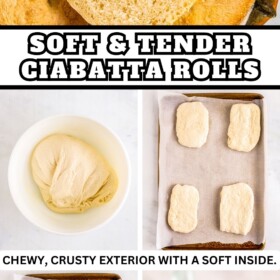
- First rise. Grease a large, clean bowl and place your dough in it. Cover the bowl with plastic wrap and place the dough somewhere warm to rise for about 30 minutes.


- Stretch and fold. After the first rise, grease your hands and then stretch and fold each side of the dough to the opposite side, as pictured.
- Second rise. Afterward, re-cover the bowl with plastic wrap and let the dough rest for another 30 minutes.
- Repeat. Repeat this process another 3 times, for a total of 4 stretches/folds and 2 hours total of rising time. After the last stretch, let the dough rest for another 30 minutes. Whew! It’s a bit of effort, but trust me when I say that these ciabatta rolls are worth it.
Shape and Bake the Rolls
Now, you’re ready to shape your ciabatta rolls and get them into the oven:


- Shape the rolls. Turn the dough out onto a clean floured surface. Roll the dough out into a log, and use a sharp knife to cut the log into 6 even-sized pieces. Press each dough piece into a rough square.
- Rest the rolls. Next, arrange the rolls on a greased and lined baking sheet, leaving plenty of room in between. Leave the rolls to rest for 30 minutes while you preheat the oven.


- Moisten with water. Before the rolls go into the oven, give the tops of the dough squares a generous spritz with water. They should look quite wet.
- Bake. Bake your ciabatta rolls in the center of the oven at 425°F for 18 minutes, or until the bread is golden and baked through. Afterward, enjoy the rolls warm, or let them cool completely before serving.

Recipe Notes
- Stretch and rest the dough. Make sure to follow the stretching and resting instructions as written (no shortcuts!). Taking the time to stretch, fold, and let the dough rise builds up the gluten, for a chewy, airy ciabatta roll.
- The dough will be sticky. It’s completely normal for ciabatta dough to be sticky and wet. If you have difficulty handling the wet dough, a bench scraper is a handy tool for working and shaping the dough into individual rolls.
- Water, or steam? If you don’t have a squirt bottle or similar to spray the rolls with water, another option is to steam the rolls in the oven. Place a baking sheet on the bottom rack of the oven, and fill it with water before preheating. You’ll have to be quick getting your rolls into the oven, to keep too much steam from escaping!

Serving Suggestions
Ciabatta rolls are very versatile. You can use them for sandwich buns, top them with bruschetta toppings (like these roasted cherry tomatoes), or serve them as a generous-sized dinner roll with just about anything! Here are some of my favorite ways to serve these ciabatta rolls:
- With Saucy Dishes: This creamy Chicken Florentine is just begging for a soft, chewy bread roll to soak up that luscious sauce! Mozzarella-stuffed chicken parmesan is another delicious and saucy dish that pairs great with these rolls.
- As Sandwiches: Stuff your ciabatta with BBQ pulled chicken or my favorite loaded tuna salad for a satisfying lunch. Or, add cheese and toast it for an amazing tuna melt! Any sandwich is immediately upgraded with homemade bread. I think these rolls would make an amazing eggplant parmesan sandwich, too.
- With Soup: Any soup is better with bread, so serve up your homemade rolls alongside a warm bowl of your favorite. Try this creamy Panera Bread-style tomato soup, this Tuscan chicken soup, or a hearty slow cooker beef stew.
- As Garlic Bread: Turn these ciabatta rolls into homemade garlic bread! Slice them in half and smother them with garlic butter before toasting them in the oven.
Storing and Freezing Ciabatta Rolls
- To store. Ciabatta rolls may be stored in an airtight container or baggie for up to 3 days.
- Freeze. You can also freeze the cooled rolls in freezer bags for about 3 months. Thaw at room temperature before serving.
More Homemade Bread Recipes
Ciabatta Rolls
Ingredients
Starter:
- 1 ⅓ cups all purpose flour
- 1 cup water
- ¼ teaspoon active dry yeast
Dough:
- All of the starter from above
- 2 ¾ cups all purpose flour
- 1 ½ teaspoons active dry yeast
- 1 ½ teaspoons salt
- ¾ cup water
Want to save this recipe?
Instructions
- Starter: Night before making rolls: In a medium sized bowl, whisk to combine the flour, water and yeast. Cover with plastic wrap and let set out on the counter overnight. It should be large and bubbly the next day.
- Dough: In the bowl of a stand mixer fitted with a hook attachment combine the flour, yeast and salt. Whisk together to combine.
- Add in starter from the night before and water. Knead for 10 minutes. The dough will be very sticky. Grease a separate large bowl. Transfer the dough into the greased bowl and cover with plastic wrap. Let the dough rise for 30 minutes.
- With greased hands, stretch and fold each side of the dough to the opposing side. Re-cover and let rest for an additional 30 minutes.
- Repeat this process another 3 times for a total of 4 stretches and 2 hours of rest time. After the last stretch, let the dough rest for another 30 minutes.
- Once the dough has rested for the last time, remove it from the bowl and turn it out onto a clean, lightly floured surface. Roll out into a log, as even as possible. Cut into 6 equal pieces. Press each piece into a rough square.
- Place the rolls onto a greased, parchment lined baking sheet, about 3" apart. Let the rolls rest for 30 minutes. Preheat the oven to 425°F.
- Once the rolls have rested, spray each one generously with water. They should look quite wet. Place rolls into the oven on the center rack. Bake for 18 minutes, until golden and baked through.
- Once baked, remove from the oven. Allow the rolls to cool down a little before serving warm, or cool completely if you want to serve them at room temperature.
⭐️ Tried this recipe? Leave a comment and rating! It only takes a minute and helps support our family-run blog. ❤️
Notes
Nutrition
Post may contain affiliate links. Read my disclosure policy.
