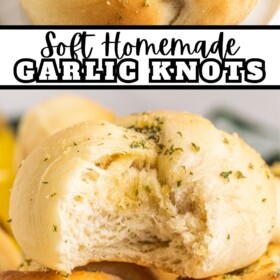


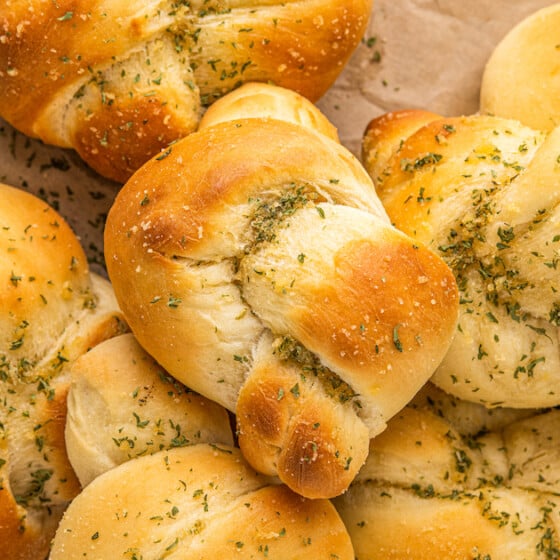
Soft, fluffy, Homemade Garlic Knots are baked to a lovely golden brown, then brushed with seasoned garlic butter. These buttery knots have oodles of flavor and a soft, tender texture, making them truly irresistible!

Why You’ll Love These Easy Garlic Knots
There’s so much to love about homemade garlic knots! Here are just a few reasons you’ll love making and serving them:
- Flavor and Texture: First and foremost, you’re going to love these because they are just so darn tasty. Nothing beats that savory garlic butter, slathered over fresh, soft, yeast rolls.
- Crowd-Pleasing Side: This is the kind of recipe that will make your family and guests ooh and ahh. You’ll be amazed at how quickly a basket of these tasty rolls will disappear!
- From Scratch: If you like serving food made from scratch, this recipe is for you! There’s nothing artificial here, just plain, wholesome ingredients.
- Make-Ahead Friendly: You can easily make these ahead, if you like, and store them in your freezer. Check out the “Can I Freeze These?” section for more!

The Ingredients You’ll Need
To make homemade garlic knots, you’ll need a few basic ingredients. The list might seem a little long, but each one is a basic pantry item that you probably already have on hand. (Be sure to check the printable recipe card at the bottom of the post for ingredient amounts and complete instructions!)
- Milk and Water: To prove the yeast. Warm them up – not too hot, think just above body temperature.
- Yeast: Active dry yeast. Be sure to measure carefully.
- Sugar: Granulated sugar is fine here, or you could use honey, syrup, brown sugar, etc.
- Eggs: Large, whole eggs add richness and flavor to the garlic knots.
- Flour: All-purpose flour is my go-to.
- Salt
- Butter: Salted butter, at room temperature.
For the Garlic Topping
- Olive Oil and Butter: Melt the butter before making the topping.
- Garlic Powder: This adds an intense garlic flavor – so good! You could also use fresh garlic if you prefer, or lightly sauté the fresh garlic for milder flavor.
- Parsley: Or an Italian herb mix.
- Salt

How to Make Garlic Knots
If you have ever made yeast rolls before, you know the drill – you will make the dough, let it rise, shape it, and let it rise again. If you’ve never made yeast rolls before, the recipe card will walk you right through it! Here’s a quick overview:
- Prove the Yeast. Lightly whisk together the milk, water, yeast, and a little sugar. Let this sit for 5 minutes, until bubbly and frothy.
- Make the Dough. Then you’ll mix in the rest of the dough ingredients and knead them to make a smooth, elastic dough.
- First Rise. Shape the dough into a ball, place it in an oiled bowl, cover, and let rise for about one hour.


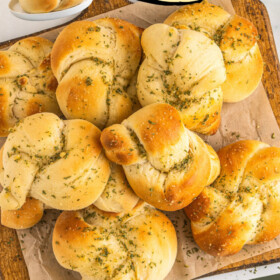
- Shape the Knots. This part is fun! Turn the dough out, shape it into a disc, and then cut it into 12 slices. Roll each slice into a rope, and tie it into a knot. Easy!
- Second Rise. Let the knots rise for about 15 minutes, while the oven preheats.


- Bake. Bake the garlic knots at 400°F for 12 – 15 minutes, or until they’re golden-brown.
- Make the Topping: While the knots bake, whisk the topping ingredients together.
- Finish the Dish. Brush the garlic-butter topping all over the warm garlic knots, and enjoy!


How Do You Tie a Garlic Knot?
Tying the knot is so easy, and it doesn’t have to be perfect to bake up beautifully. Basically, you’ll roll a small piece of dough into a thin rope. Then, make a loop with the rope, cross the other end over, and tuck it through the loop. Voila! A simple knot. You can leave the ends of the knot to each side, or take the top end and tuck it underneath, then take the bottom end of the knot and fold it over the top and into the center.

Helpful Tips
If you decide to try making these from-scratch garlic knots, be sure to check out these simple baking tips. They’re sure to make your baking experience even easier, and help those garlic knots turn out picture-perfect.
- Adding the Flour: Once you’ve added 5 cups of flour, knead the dough until all the flour is incorporated and the dough starts to come together. If the dough doesn’t start to form a shape in the mixer, and seems really sticky, go ahead and add in the last cup of flour.
- Preheating: If your oven takes longer than 15 minutes to preheat, then go ahead and turn it on sooner than the recipe says. You do not want the knots to overproof at this stage, or they will get too big! Overproofed knots also bake up disappointingly hard and rubbery in texture. So be sure to time the second rise and get them in the oven as soon as it’s done.
- Milk and Water: Although I recommend using the combination of milk and water, you can use warm water only if you prefer.
- Butter: I usually go with salted, but you could use unsalted instead. If you do, then you will want to add another ¼ teaspoon of salt to the dough.

What to Serve with Garlic Knots
Although you’ll want to devour them right off the pan (and hey, no shame in that), you can serve garlic knots as part of almost any meal. They go with everything! Our favorite options are classic Italian-American dishes like these:
- Marinara Sauce: For a great appetizer, serve garlic knots with a side of warm Marinara Sauce for dipping. This tangy, hearty sauce pairs perfectly with garlic knots, adding an irresistible pizza-like flair.
- Soup: Garlic knots and soup are a must-make combo for fall and winter, you guys. Seriously, this Sausage and Kale Soup with White Beans with a side of garlic knots is a hearty cold-weather meal that will knock your socks off!
- Saucy Main Courses: Garlic knots make a fantastic accompaniment to creamy, saucy dishes as well, like this dreamy, Creamy Chicken Florentine. Or if you are looking for something with more heat, try this Cajun Chicken Pasta!

Storing and Reheating
Leftover garlic knots (if you are lucky enough to have any) can be easily stored in your refrigerator or on the counter. Place them in an airtight container or food storage bag, and store for up to three days.
To reheat, give them a few seconds in the microwave, or bake in a 350°F oven until the knots are warmed through.


Can I Freeze These?
Yes, you can! You can freeze the leftovers in freezer bags for up to three months, or you can follow these steps to freeze the unbaked knots:
- Shape. Shape the knots as directed.
- Flash-Freeze. Freeze the knots on a baking sheet for a hour or two, until frozen solid.
- Pack and Freeze. Place the frozen knots in a zip-top freezer bag, and store in your freezer for up to three months.
- Thaw. The night before you want to bake them, take the knots out of the freezer, place them on a baking sheet, cover, and place in the fridge. They’ll thaw there overnight.
- Rise and Bake. Set the baking sheet of rolls on the counter, and let them rise there for about one hour. Don’t overproof them – it would be better to underproof than overproof. Bake the knots as directed, and enjoy!
More Homemade Dinner Rolls
- Soft Dinner Rolls Recipe
- Homemade Crescent Rolls
- Hawaiian Rolls
- Mexican Bolillos
- Easy Ciabatta Rolls
- Dinner Potato Rolls
- Texas Roadhouse Rolls
Homemade Garlic Knots
Ingredients
Ingredients:
- 1 ½ cups warm milk
- ⅔ cup warm water
- 1 tablespoon + 1 teaspoon yeast
- 3 tablespoons granulated sugar, divided
- 2 large eggs
- 5 to 6 cups all-purpose flour
- 2 ½ teaspoons salt
- ½ cup salted butter, room temperature
Garlic Topping:
- 3 ½ tablespoons olive oil
- 2 tablespoons melted butter
- 1 tablespoon garlic powder, or minced garlic
- 1 teaspoon parsley
- ¼ teaspoon salt
Want to save this recipe?
Instructions
- In the bowl of a stand mixer, fitted with a whisk attachment, combine warm milk, warm water, yeast and 1 tsp of sugar. Lightly whisk together until just incorporated, then let the mixture sit for 5 minutes, until bubbly and frothy.
- Once the mixture has proofed, add in the remaining sugar and eggs. Whisk until combined. Swap the attachment to a dough hook and add in 5 cups of flour and the salt. Knead on medium-low speed until combined until the dough comes together. If the dough doesn’t start to form a shape in the mixer and is really sticky, go ahead and add in the last cup of flour.
- Once the dough starts to come together, add in the butter and knead for 6 minutes, or until tacky but not sticking to your fingers.
- Remove the dough from the bowl and shape it into a ball. Grease the mixing bowl, then place the dough back inside. Cover with plastic wrap and let rise for 1 hour.
- Once risen, turn the dough out onto a clean, floured surface. Shape into a disc, then cut into 12 equal pizza slices. Roll each slice into a 10” rope, then fold each rope into a knot. Place the knots onto 2 parchment lined baking sheets, about 2” apart.
- Preheat the oven to 400°F. Let the knots rise while the oven preheats – about 15 minutes.
- Once the oven has heated, place the baking sheets in and bake for 12-15 minutes.
- Garlic Topping: While the knots are baking, mix together the topping. In a small mixing bowl whisk together olive oil, melted butter, garlic powder, parsley and salt. Set aside until ready to use.
- Once the knots are golden and baked through, remove from the oven. Brush on the topping immediately. Serve while warm.
⭐️ Tried this recipe? Leave a comment and rating! It only takes a minute and helps support our family-run blog. ❤️
Notes
To make ahead:
- Shape. Shape the knots as directed.
- Flash-Freeze. Freeze the knots on a baking sheet for a hour or two, until frozen solid.
- Pack and Freeze. Place the frozen knots in a zip-top freezer bag, and store in your freezer for up to three months.
- Thaw. The night before you want to bake them, take the knots out of the freezer, place them on a baking sheet, cover, and place in the fridge. They’ll thaw there overnight.
- Rise and Bake. Set the baking sheet of rolls on the counter, and let them rise there for about one hour. Don’t overproof them – it would be better to underproof than overproof. Bake the knots as directed, and enjoy!
Storing and Freezing:
Leftover garlic knots (if you are lucky enough to have any) can be easily stored in your refrigerator or on the counter. Place them in an airtight container or food storage bag, and store for up to three days. To reheat, give them a few seconds in the microwave, or bake in a 350°F oven until the knots are warmed through.Nutrition
Categories:
Post may contain affiliate links. Read my disclosure policy.

Not sure what I did wrong – could not get the dough to form! I am sure it is me – these looked like they would be so tasty! I won’t take any stars off because it was probably user error, lol!
The dough is definitely sticky to work with, but should have baked up ok! How did they taste/turn out after baking?