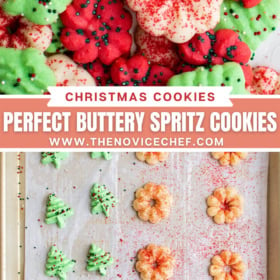
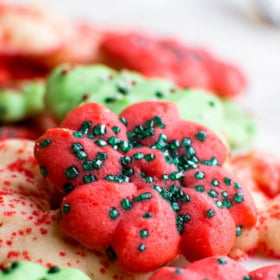
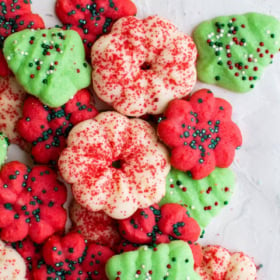
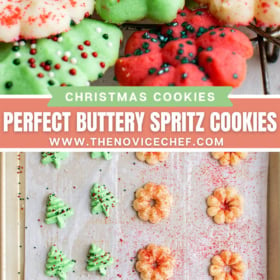
Get in the mood for the countdown to Christmas with Buttery Spritz Cookies! These red, white and green cookies are the sweet little treats that are a totally irresistible addition to your cookie tray.

Why You’ll Love This Spritz Cookie Recipe
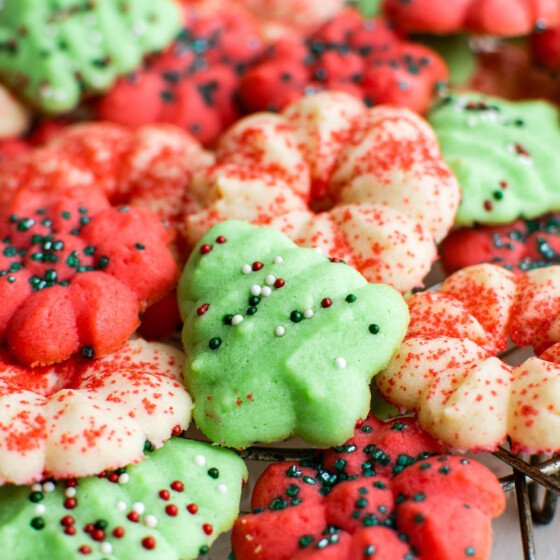
- They’re so colorful and festive! I can’t help but smile when I look at them. These spritz cookies will definitely help bring the holiday cheer.
- Kids can help make them: This spritz cookie recipe is a great treat for your kiddos to help with because they’re so easy to bake and decorate. How do I get those perfect shapes, pictured above? By using a Cookie Press! (Scroll down for more info on how it works.)
- Only a few ingredients: You’ll need a few pantry staples plus sprinkles and food coloring to make these festive cookies.
Looking for more Christmas cookie ideas? Check out my Lofthouse Cookies, White Chocolate Macadamia Nut Cookies, Peanut Butter Oatmeal Cookies, and Butterscotch Haystack Cookies too!

What are Spritz Cookies?
Spritz cookies get their name from the German word ‘spritzen,’ meaning ‘to squirt’ in English. I don’t know if I’d describe using the cookie press as ‘squirting out cookies,’ but close enough.
Taste-wise, spritz cookies are a lot like sugar cookies; sweet, soft, chewy, and totally delicious! They’re also kind of like shortbread cookies, but the egg makes them less crumbly.

Recipe Ingredients
Here’s a quick run-down of the ingredients you’ll need for this spritz cookie recipe. Be sure to scroll down to the recipe card for measurements.
- Salted Butter: Softened, not melted.
- Powdered Sugar: Sweetens the cookies.
- Egg: To help the cookies keep their shape when using the cookie press and when they are baking.
- Milk
- Vanilla Extract: Adds a light flavor to the cookie.
- All-Purpose Flour: Be sure to measure properly.
- Food Coloring: I used red and green food coloring, since these were intended to be Christmas cookies. You can use any other color desired.
- Sprinkles: Since these were Christmas cookies, I sugar red, green, and multi-color sprinkles.
- Cookie Press Tube: The key to perfect shaped spritz cookies!

How to Make Spritz Cookies
Let’s get these cookies into the oven and onto your table! Here’s an overview of how to make the perfect spritz cookie but scroll down to the recipe card below for more detailed instructions.


- Make the dough: Cream the butter until light and fluffy. Sift in the powdered sugar and beat until smooth, then add in the egg, milk, and vanilla. Beat to combine. Sift in the flour and stir.
- Add the food coloring: Divide the dough into three bowls (or as many as you’d like different colors). Add green food coloring to one bowl, red to another, and leave the third one plain.


- Chill: Cover and bowls and chill for at least 30 minutes in the fridge.
- Press the cookies: Select the cookie press shapes desired. Press the cookies onto the baking sheet and top with your choice of sprinkles.
- Bake: Bake for 6-7 minutes, until the edges just start to turn a light golden color.
- Cool: Cool for 5 minutes on the baking sheet then transfer to a cooling rack.

What is a Cookie Press & How Do I Use It?
A cookie press is a cylindrical baking tool with a plunger on one end, and a disc with a cutout that will give the cookie its shape on the other end.
All you have to do is load the dough into the tube of the cookie press, carefully press down on the plunger with the opening of the cookie press on the baking sheet, and press out a cookie! Sometimes the cookie will stick to the press when you lift it up, but you can just gently peel it off and place it on the baking sheet.
Tips for the Best Spritz Cookies
Read through some of these tips for the best results with your spritz cookies:
- Dip Them in Chocolate: A chocolate coating (or a glaze) would be divine on these cookies.
- Don’t Over-Bake: Once the edges of the cookies start to turn golden, pull them out and let them finish baking/cooling on the pan.
- Getting the Dough to Stick: If the cookies won’t stick to the parchment paper you can remove it and just bake them on the pan, but this means you will have to watch the baking time even more closely.
- Cream the Butter and Sugar Well: The lighter and fluffier you can get it to be (I recommend at least 5 minutes), the easier the dough will go through the cookie press.

Proper Storage
- Counter. Spritz cookies can be stored for up to 2 weeks in an airtight container at room temperature.
- Freezer. If you want to freeze them, they will last for 2-3 minutes in an airtight container.
Buttery Spritz Cookies
Ingredients
- 1 cup (2 sticks) salted butter, softened
- 1 cup powdered sugar
- 1 egg, room temperature
- 1 tablespoon milk
- 1 teaspoon vanilla extract
- 2 cups all-purpose flour
- 1-2 teaspoons red food coloring
- 1-2 teaspoons green food coloring
- Red sugar sprinkles
- Green sugar sprinkles
- Red, green and white variety sprinkles
- Cookie press tube
Want to save this recipe?
Instructions
- In a large bowl, whip the butter until light and fluffy with a hand mixer or stand mixer.
- Sift in the powdered sugar into the bowl and beat again until smooth and fluffy. Add the egg, milk and vanilla extract and beat again until well combined. Sift in the flour and stir until combined.
- Divide the dough into three separate bowls. Mix as much of the green food coloring into one third of the dough until desired color reached. Repeat with the red food coloring, leaving the third bowl plain.
- Cover the bowls and chill dough for 30 minutes in the fridge, or up to 48 hours.
- Preheat the oven to 375°F and prepare a cookie baking sheet with parchment paper or spray with non-stick spray.
- Select the cookie press shapes that you would like to use and push the dough into the tube according to the instructions on your cookie press manual. Place the disk shape that you are using on the tube and seal it.
- Press the cookies out onto the prepared baking sheet, not too far apart as these will not spread that much. Sprinkle your choice of sprinkles onto the cookies, if desired.
- Bake for 6 -7 minutes, or until the edges just start to turn a light golden color.
- Remove from the oven and let them cool for 5-6 minutes before removing them from the pan and cooling completely on a cookie cooling rack.
- Repeat the baking process with the remaining dough then serve once cooled.
⭐️ Tried this recipe? Leave a comment and rating! It only takes a minute and helps support our family-run blog. ❤️
Notes
Nutrition
Categories:
More Christmas Recipes You’ll Love
- Reindeer food (complete with a printable) is a super cute craft for the kids!
- Homemade eggnog is creamy, rich, and oh so smooth.
- Light and airy peppermint meringues are sprinkled with crushed candy canes!
- Gingerbread man cookies are classic cookies that always bring the holiday spirit.
Post may contain affiliate links. Read my disclosure policy.
