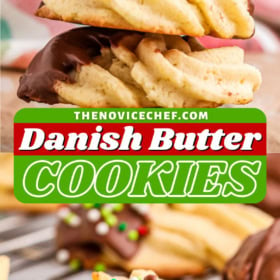

This easy recipe for Danish Butter Cookies is sure to be your new holiday favorite! Pretty swirls of soft buttery dough bake into crisp, meltaway cookies, dipped in chocolate and dressed with sprinkles.

Classic Christmas Butter Cookies with Chocolate and Sprinkles
I know for a lot of us, Christmas comes around and we find ourselves remembering all kinds of traditions that had slipped our minds since last time. “Oh right, Advent calendars,” we think, seeing them at the grocery store. “Oh yeah, that green pickle ornament, those little snow globes from vacation, driving to see Christmas lights, putting up the wreath…”
And the food is the same way, isn’t it? Suddenly we find ourselves thinking, “Oh, I need to remember to make divinity candy,” or the Yule log, or the homemade eggnog, the Irish coffee… so many traditions, so little time!
And you can’t forget the butter cookies! For lots of us, that iconic blue tin of butter cookies always brings a smile. The cookies are all basically the same dough, but baked in different shapes with different toppings. They’re festive and bright, perfect for Christmas. But did you know you can make them at home? It’s actually really easy! In this recipe, we’ll make the sweet butter cookie dough, and then pipe it into distinctive swirls before icing with melted chocolate. Yum!

Are Danish Butter Cookies the Same as Shortbread Cookies?
Yes and no! Butter cookies, shortbread, and sugar cookies are all made with pretty much the same list of ingredients, but the amounts make a big difference in texture.
Shortbread cookies have the most butter, making them very crumbly with an almost “hollow” crispness.
Sugar cookies have the most flour, which gives them a less crumbly texture, good for making defined shapes and even cutout cookies.
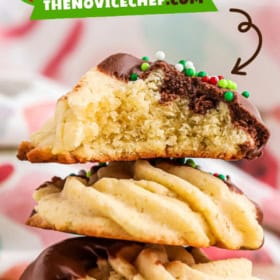
These Danish butter cookies are right in the middle, with a crispness that immediately turns delicate and “melt in your mouth” when you eat one.

Recipe Ingredients
To make these butter cookies, all you need are a handful of basic pantry staples. Here’s a quick rundown of the list (for the full recipe card with amounts, scroll down to the bottom of this post).
For the Cookies
- Butter: The butter should be set out on the counter well in advance, so that it comes to room temperature. It should be totally soft (but not melted).
- Sugar: Some recipes call for powdered sugar, but I like the texture that you get by using granulated sugar.
- Vanilla: For the best flavor, I recommend using pure vanilla extract.
- Egg: One whole egg helps to bind the cookie dough together, and enriches the flavor.
- Flour: Sift the flour before using to make sure there are no lumps.
- Salt: Just a couple of pinches.
For the Chocolate Icing
- Chocolate Chips: I use regular semi-sweet chocolate chips in this recipe, but you could substitute any good melting chocolate that you like.
- Butter: A tablespoon of butter helps create the shiny dipping chocolate.


How to Make Danish Butter Cookies
Making the cookie dough is so easy! Be sure to have a good piping bag and a large tip for creating the special swirl shape (1M star tip, or similar).
- Prep then Oven and Cookie Sheets. Before you get started, set your oven to preheat to 375°F. Line two cookie sheets with parchment paper, or silicone baking mats, and set aside.
- Cream the Wet Ingredients. In a large bowl, cream the butter with the sugar, and vanilla extract, until the mixture is light and fluffy. This should take five minutes or more. Then add the egg, and beat until well combined.
- Add the Dry Ingredients. Add the all-purpose flour and salt to the butter mixture, and mix thoroughly until the dough comes together. It should be soft and light. The softer the butter was, the softer the dough will be.


- Pipe the Cookies. Scoop the dough into a piping bag fitted with a size 1M star tip. Pipe the cookies onto a greased cookie sheet, leaving a little space between each cookie for spreading. The dough may require some muscle to pipe!
- Bake. Bake the cookies for 8 – 10 minutes, until the edges of the cookies are just starting to brown. Take the baked cookies out of the oven, and let them rest on the cookie sheet for a few minutes, before carefully transferring them to a cooling rack.
- Make the Chocolate Icing. Once the cookies have cooled completely, make the chocolate icing. Place the chocolate chips and butter in a microwave-safe bowl, and heat them at 50% power for 30 seconds at a time, stopping to stir each time, until the chips are melted and the mixture is smooth.
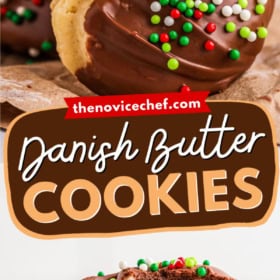
- Ice the Cookies. Have a tray lined with clean parchment or wax paper ready. One by one, dip the cookies into the melted chocolate icing, and lay them carefully on the tray. Decorate with sprinkles, if you’re using them, so the sprinkles will stick to the icing before it hardens. Let the iced cookies cool until the chocolate is set (about half an hour).
- Enjoy!


Tips for Success
This is an easy cookie recipe, but there are still a few helpful hints I’d like to share for making the best butter cookies possible. Read on, and happy baking!
- Serve Cool… or Warm. Sometimes we just can’t wait, and sneak a few cookies while they’re still warm. They’re wonderful that way! So reward yourself for making homemade cookies, and have a few right off the cooling rack.
- Piping Troubleshooting. The dough does take some muscle to pipe. Make sure the piping tip you are using is big enough for the cookie dough to move through. If the tip is too small, it is almost impossible to get any dough out, no matter how hard you squeeze. If the dough still won’t budge, put it back in your mixing bowl and quickly beat in a couple of tablespoons of milk.
- Chill Out: If the dough is very soft, you may want to chill your piped cookies for 20 minutes or so before baking. Soft dough can melt and lose its shape in the oven.
- Icing with Caution: Be careful not to overheat the chocolate when you are melting it for the icing. Once chocolate becomes overheated, it starts to thicken up and get chunky, and can’t be used to ice the cookies.
- Slice, Roll, or Press: You don’t have to pipe these if it is too much hassle! You could also roll the dough into balls and flatten slightly, roll the dough into a log and slice it, or use a cookie press!

How to Store Danish Butter Cookies
To store, place in airtight containers or bags and store at room temperature for up to one week.
Can I Freeze These?
Yes! You can pack the cookies into shallow, airtight containers and freeze them for up to one month (iced) or two months (not iced). Thaw at room temperature before serving.


Danish Butter Cookies
Ingredients
For the Cookies
- 1 cup (2 sticks) butter
- ½ cup granulated sugar
- 1 teaspoon vanilla extract
- 1 egg
- 2 ½ cups all-purpose flour, sifted
- ¼ teaspoon salt
For the Icing
- 1 cup semi-sweet chocolate chips
- 1 tablespoon butter
Want to save this recipe?
Instructions
- Heat the oven to 375°F. Line two cookie sheets with parchment paper, and set aside.
- In a large bowl, cream the butter, sugar, and vanilla extract, until light and fluffy. Add the egg and beat until well combined.
- Add the all-purpose flour and salt, and mix thoroughly until the dough comes together.
- Transfer the dough into a piping bag with a size 1M star tip. Pipe the cookies onto a greased cookie sheet, leaving a little space between each cookie for spreading.
- Bake for 8 – 10 minutes, until the edges of the cookies are just starting to brown. Remove the cookies from the oven, and let rest for 5 minutes before transferring the cookies to a cooling rack to finish cooling.
- Once the cookies have cooled completely, make the chocolate icing. Place the chocolate chips and butter in a microwave-safe bowl. Heat at 50% in 30-second bursts, stopping to stir each time, until it reaches a smooth consistency.
- Dip each cookie into the melted chocolate icing, and place on a piece of parchment paper or wax paper. Decorate with sprinkles, if desired. Let cool until the chocolate is set, about 30 minutes.
- Store the cookies in an airtight container at room temperature for up to one week.
⭐️ Tried this recipe? Leave a comment and rating! It only takes a minute and helps support our family-run blog. ❤️
Notes
Nutrition
More Christmas Cookie Recipes
- Red and Green M&M Christmas Cookies
- Old Fashioned Christmas Pinwheel Cookies
- Pfeffernusse Cookies
- Peppermint Oreo Truffle Balls
- Orejas (Palmier Cookies)
- Copycat Lofthouse Cookies
- Chewy Peanut Butter Cookies
- White Chocolate Gingersnap Cookies
- Frosted Sugar Cookie Bars
- Buttery Spritz Cookies
- Peanut Butter Blossoms
Post may contain affiliate links. Read my disclosure policy.
