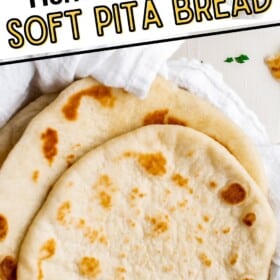

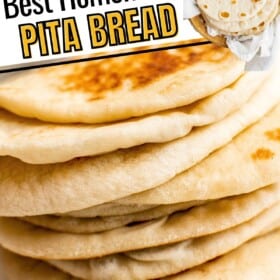
This easy homemade pita bread recipe is ready in under an hour and delivers soft, chewy pitas that are perfect for everything from sandwiches to dipping. With just a few simple ingredients, you’ll have authentic, delicious pita bread that rivals anything from the bakery!

Jessica’s Recipe Rundown
Living in Tampa, we have a large Greek community and I used to just pick up a batch of pita from the local shops. It wasn’t until I tried making it from scratch that I truly fell in love. There’s something so satisfying about watching the dough puff up on the hot skillet, knowing that soon I’ll have warm, fresh pitas to slather with my favorite homemade tzatziki sauce! Here’s why I think you will love this easy pita bread recipe too:
- Easy to Make: With just 6 simple ingredients and easy to follow steps, you’ll have fresh, homemade pita bread ready in no time. No special equipment needed!
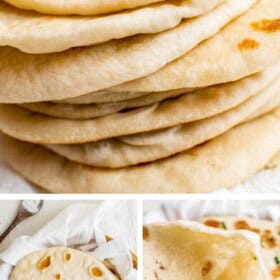
- Perfect Texture: They’re so soft, chewy and tender, but with a crispy, golden exterior thanks to cooking on a hot skillet instead of in the oven.
- Versatile: Use this pita bread for sandwiches, wraps for falafel, dipping it in hummus, or as a side with my favorite juicy chicken souvlaki!
- Budget-Friendly: Making your own pita bread at home is not only delicious but also a cost-effective alternative to store-bought bread.
“I will never buy pita bread from the grocery store again! This homemade pita bread recipe cost almost nothing to make using things I already had in my pantry and it tastes a million times better than dry grocery store pita bread. Plus, it really was so easy to make, light and fluffy… I’ve never had pita bread so good. I can’t stop bragging about it. I will be making this all the time now, it’s truly that good!!” — Brittany, recipe tester, home cook, and homesteader.

Key Ingredients
Below you will find helpful notes for key ingredients used to make this easy homemade pita bread recipe. Visit the printable recipe card for the full ingredient list and amounts.
- Flour: I generally use all-purpose flour, but you could try this recipe with whole wheat flour or a mix of the two.
- Yeast: You’ll need active dry yeast so that the dough can rise. I have tested this recipe with instant yeast, but a few times my dough did not rise as much. If you choose to use instant yeast, you do not have to proof it and can add it directly to the flour.
- Sugar: I used granulated sugar, but any similar sugar will work. You only need a little!
- Water: Your water should be warm so that the yeast activates, but not hot.
- Olive Oil: I like to stick to extra virgin olive oil, but other mild flavored cooking oils can be used instead.

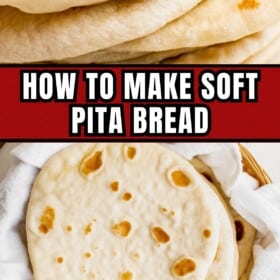
How to Make Pita Bread
Making homemade pita bread is easier than you’d think and so satisfying! Below is a quick step-by-step recipe overview with some helpful tips for success. Please scroll down to the printable recipe card for full instructions.


Start by activating the yeast in warm water with sugar. After 5 minutes, it should be frothy and bubbly.
Next, stir in olive oil and salt, then gradually add flour. Begin with 2 ½ cups, adding more flour, one tablespoon at a time, until the dough pulls away from the sides and feels slightly tacky.


Knead the dough on a floured surface for 10 to 15 minutes, until smooth and elastic. It should spring back slowly when pressed.
Place the dough in an oiled bowl, cover with a kitchen towel, and let it rise in a warm spot for 1 hour, or until doubled in size.


Divide the dough into 10 balls, cover, and let the dough rest for 20 minutes.
Then roll each dough ball with a rolling pin into a ¼-inch thick circle (about 6 inches wide). The dough should roll easily and evenly without snapping back.


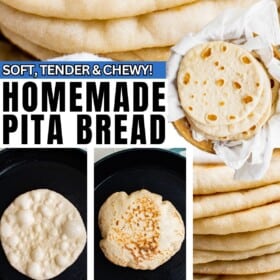
Heat a cast iron skillet over medium and lightly oil it. Cook each pita for 30 seconds, flip, cook another 30 seconds, then flip again for 1 minute. Look for big bubbles and puffing. Not all will puff perfectly, but they’ll still be soft and delicious.
To keep the pita bread warm while you cook the remaining pitas, wrap the cooked pitas in a warm kitchen towel (microwaved for 30 seconds) or foil. You can also place the cooked pitas (wrapped in foil or a clean, slightly damp kitchen towel to retain moisture) on a baking sheet and keep them warm in an oven heated to 200°F.

Chef’s Tips and Variations
- Can I Use a Stand Mixer? Sure! When you’re combining all of the ingredients, use a stand mixer if you would like to. I prefer to knead this bread with my hands because I think the texture is best when I do it that way, but it’s totally up to you.
- Let the Dough Rise in a Warm Area: You don’t want it to be surrounded by heat, but the dough should be kept in relative warmth if you want it to truly double in size. Avoid cool temperatures too – this could slow the activity of the yeast.
- Use Minimal Flour When Kneading and Shaping: Add a dusting of flour if the dough gets too sticky to handle, but don’t overdo it or the dough will become hard. The dough should be tacky, but not too sticky to knead.
- Add Flavor to the Dough: For a twist, try adding garlic powder, za’atar, Greek seasoning, or dried herbs to the dough for extra flavor.
- Use a Pizza Stone in Oven: Heat a pizza stone, or a large cast iron skillet, in the oven at 475°F. Coat pizza stone in olive oil and add as many pitas as you can fit without overlapping. Bake for 2 minutes on one side, then flip pita over to bake for 1 minute more on the other side.
Easy Pita Bread Recipe
Ingredients
- 2 tablespoons granulated sugar
- 1 tablespoon active dry yeast
- 1 cup warm water
- 2 teaspoons salt
- 1 ½ tablespoons olive oil
- 3 cups all-purpose flour, divided
Want to save this recipe?
Instructions
- Whisk together the sugar and yeast in a large bowl, then stir in the warm water. Let the yeast activate for about 5 minutes, or until frothy.
- Add the salt and olive oil, and then using a wooden spoon, add 2 ½ cups of flour. Continue stirring and add a tablespoon of flour at a time until the dough starts to pull away from the sides.
- Dust a counter with some of the remaining flour. Turn the dough out onto the counter and knead it for 15 minutes, until it's smooth, soft, and stretchy. (If you have a stand mixer with a kneading attachment then you’ll only need to knead for 10 minutes.) Add a dusting of flour as the dough gets too sticky to handle, but don’t overdo it or the dough will become tough/hard. The dough should be tacky, but not too sticky to knead.
- Tuck in the edges of the dough then coat the same bowl with olive oil that you used before. Add the dough and roll it around in the bowl to coat it in the olive oil.
- Cover the bowl with plastic wrap or a kitchen towel and let it rise for about an hour in a warm area, until it has doubled in size. A good visual cue: press two fingers into the dough. If the indent stays, it’s ready.
- Remove the dough from the bowl and cut it into 10 equal pieces that weigh about 2 ounces each. Tuck in the edges of each of the pieces to form balls then cover them with a towel and let them rest for 20 minutes.
- With a rolling pin, roll out the dough balls, one at a time, into a ¼ inch thick disk (that’s about 6 inches across). These do not have to be perfect, just form the best circle or oval that you can.
- Let the uncooked pita dough rest for five minutes as you heat a large cast iron skillet over medium heat. Lightly coat the pan in some olive oil then place one of the uncooked pitas in the pan.
- Cook for 20 to 30 seconds or until you see 4 to 5 bubbles start to form, then flip the pita over and cook for another 20 seconds then flip it again and cook for 1 minute and allow the bread to puff up.
- Flip it again and let it puff up more then remove it from the pan and cover with a towel to trap the steam and keep them soft. Repeat the process with the remaining uncooked pitas, then serve! Not all of the pitas will puff up, but they should all form large bubbles. I like to wrap my pitas with foil to keep them warm as I cook them.
Oven Instructions
- Heat a pizza stone, or a large cast iron skillet, in the oven at 475°F. Coat pizza stone in olive oil and add as many pitas as you can fit without overlapping. Bake for 2 minutes on one side, then flip pita over to bake for 1 minute more on the other side.
⭐️ Tried this recipe? Leave a comment and rating! It only takes a minute and helps support our family-run blog. ❤️
Notes
Video
Nutrition
Categories:
Can This Be Made With A Different Kind Of Flour?
While yes it can, all purpose flour is truly best for soft, fluffy pitas with a nice puff. It creates a dough with a reliable texture and rise that’s easy to work with.
All-purpose flour is the best choice for soft, fluffy pitas that puff up well, with an easy to work with dough that gives reliable results. If you want a chewier pita with a slightly stronger structure, bread flour is a great option and can be swapped 1:1 with all-purpose.
Whole wheat flour works too, but it’s denser and doesn’t rise as much. For best results, use a 50/50 blend of whole wheat and all-purpose flour. If you choose to use 100% whole wheat, expect a heartier, more rustic texture. Consider adding an extra tablespoon or two of water to keep the dough from drying out.
Gluten-free flours are tricky with this recipe. Because pita bread relies on gluten to trap steam and form those classic pockets, a gluten-free flour blend likely won’t puff the same way and will have a different texture. I would search for a recipe specifically developed for using a gluten free flour.

Serving Suggestions
Pita bread is very versatile and can be served with practically anything! For a classic paring, stuff it with chicken souvlaki to create delicious chicken gyros. Or open up your pita to create a pita pocket and stuff it with falafel or Greek chicken meatballs. You can also use pita bread in place of a traditional bun for these Greek turkey burgers.
For a snack or appetizer, serve it with my creamy tzatziki sauce or hummus (or sweet potato hummus)! Or we also love it alongside our favorite green Greek salad with this flavorful Greek salad dressing.
More Homemade Bread Recipes To Try
- Made easily in a ziplock bag, this is my favorite sandwich bread recipe!
- Chewy ciabatta bread or ciabatta rolls are always a hit.
- Short on time? Try this easy beer bread recipe or Irish soda bread!
- Soft and dense, this homemade potato bread or potato rolls recipe are a family favorite.
Post may contain affiliate links. Read my disclosure policy.

I prepared chicken souvlaki so I craved some pita bread. I prepped the dough and then let my daughter fry them up. So easy, but definitely need patience to work that dough and wait for the rise. We all loved the recipe, it was so soft, not too chewy and lightly flavoured. It came out great and very yummy. We will be making this again. Thanks for the recipe and all the detail in the instructions, it was very helpful
This was delicious! Very easy to make! We usually have leftovers from our favorite Middle Eastern restaurant, but no pita bread. This was perfect, and we can freeze our extra for another meal. Thank you!
Just made this…it was fabulous! I used less flour than called for, and ended up with 12- 2 ounce dough balls. Added a bit of garlic powder, served with hummus and everyone loved it. Will be making another batch soon.
Ok I made these and added everything but the bagel seasoning and *chefs kiss*!! Sooo good. Can’t wait to make these again!
I’m not a bread maker so I was super surprised that these turned out so well for me. Could this recipe be used to make dinner rolls or a loaf of bread?
Hi Carla! I am going to be honest and say that I am not 100% sure. I would lean towards no, but I have never tired baking it into a loaf pan or as rolls before. So if you do try it, please come back to let us all know how it turns out!
Great recipe! These turned out perfect!
The yield states 6-7 pitas but the instructions say divide into 10 pieces. Could you give an idea of the size differences if I were to divide into 6 vs 10 balls of dough? I have been searching for a pita recipe like the ones used at OPA restaurants. I know they are a “fast food” type restaurant so they may not be particularly authentic but I love how fluffy and chewy their pitas are compared to the drier pocket type pitas available in grocery stores.
Hi Shelley! Thank you for catching that, it should state 10 pitas and has been updated now to show the correct yield! I would do the 2 oz balls as directed, but you can make them larger if you prefer, they will work either way. These are definitely more moist than what you would get at the store! Hope this helps!
Hi Jessica, Thank you for your reply. I printed out the recipe as it was, then realized I needed to make a little more so I scaled it up to 10 and printed. Then I thought 5 cups of flour may make too much so I scaled it back down to maybe 8? I can’t remember, but it changed to 3 tablespoons of sugar and 4.5 cups of flour. I actually ended up making 12 pitas with that recipe. They were a decent size for us to stuff with your chicken slouvaki recipe. I also used your recipes for Greek seasoning, Greek salad dressing and Greek salad for a Greek themed birthday dinner for my son. Everything was great. The pita dough was beautiful to work with.
So glad to hear it worked out and you enjoyed it all! 🙂
I loved the taste however I was hoping you can help me trouble shoot why only one proofed up and created the pocket! The rest of them stayed flat.
Hi Kailea! Hmm, that is very strange! Where they cooked all at the same time? Or did some of the dough sit for a while? I assume it was all cooked at the same time, but I am not sure why only one would puff up. I wish I had a better answer!
Omg yummm. My 3 and 6 year old helped make them and also loved them! Thank you.
Delicious taste and easy to make. Thanks for the recipe!!
Just made this recipe and ummmmmm it’s amazing!!!! So so easy to make, I will be making another batch tomorrow 🙂
I replace the water with milk simply because I prefer it that way but absolutely love these. They’re amazing and it’s so simple
Can it be left to rise in the first step for longer than 1 hr? Thanks!
Hi Trish! It can be left a little longer, but dough that is left too long to rise will eventually be over-proofed, can potentially collapse and mess with the final texture. So 20-30 minutes more would probably be the longest it could go.
Thanks so much! I’m pretty new to making breads, so this is super helpful 🙂
Great recipe. So easy. They worked well for the vegan gyros I made with them. They were light and fluffy. Highly recommend this recipe.
Could the mix, knead, and rise be done in a breadmachine??
Hi Donna! I have not tried it in a bread machine (and don’t have one), but please let us all know how it works out if you try it!