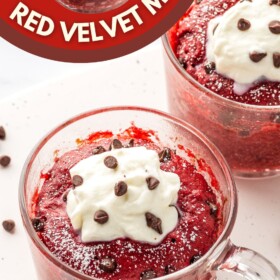
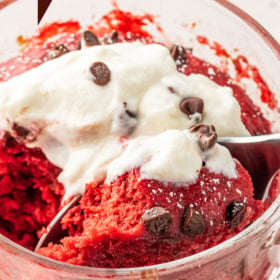
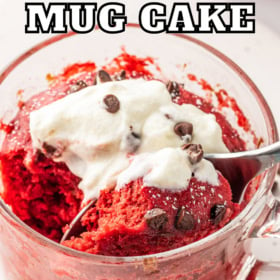
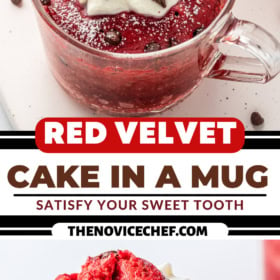
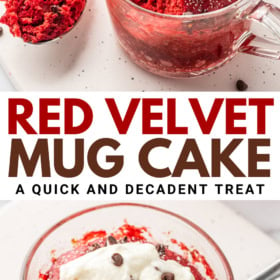
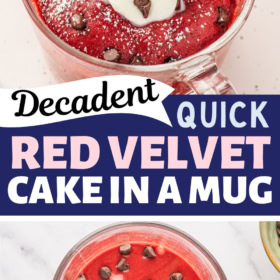
Red Velvet Mug Cake is so easy to make, with a moist crumb, and that chocolatey, tangy flavor we all love. The super easy cleanup is a bonus!

A Perfect Mini Dessert That’s So Easy to Make!
Remember when we all went crazy over mug cakes? These mini, one-serving microwave desserts were all the rage, and it’s easy to see why – who wouldn’t love a cake you can bake in just minutes? That trend brought about this Chocolate Peanut Butter Mug Cake, my Easy Pumpkin Mug Cake, and this unforgettable Vanilla Mug Cake!
Well, get ready to meet your new favorite cake in a cup – red velvet mug cake! If you love classic red velvet cake with its light, moist texture and more-ish chocolate taste, this recipe is for you.
Now, some people (cough, cough – my mom – cough, cough) don’t love red velvet. And that’s okay – it’s just that I think those people are absolutely crazy. Homemade chocolate cake, with a little tang to it, and a bright, fun color? I’m in, every single time.

What Makes Red Velvet Cake Taste Different?
Hold on to your hats, because this one might throw you off a bit. The secret ingredient in red velvet is… vinegar.
Don’t lose me, now! This cake does not taste sour. Red velvet cake was historically made with tangy buttermilk and a little extra vinegar for additional acid. Acid can help cakes rise, especially if you’re using some baking soda in the recipe. That additional acid also gave the cake its color, by reacting with the cocoa powder to create a reddish tint.
These days, whole milk and a bit of vinegar give the cake that slightly tangy flavor (think cream cheese tangy, not salad dressing tangy). Red food coloring gives it a lush, genuinely red color that’s perfect for holidays.

Ingredients
Let’s take a look at the ingredients you will need to make this cake. They are basically ordinary pantry staples, so you probably have most of them around:
- Milk: I like to use whole milk in this recipe.
- Vinegar: Plain white vinegar thickens the milk and gives the cake its signature tangy taste.
- Flour: You want plain, all-purpose flour, not self-rising flour.
- Sugar: Granulated sugar. Brown sugar would also work, but I think granulated is better here.
- Cocoa Powder: You can use regular, Dutch process, or raw. Regular is what I typically have and use.
- Baking Powder: For a good rise and a light cake.
- Salt
- Oil: A small amount of vegetable oil gives the red velvet mug cake a moist, swoon-worthy texture, without weighing it down.
- Food Coloring: Red food coloring isn’t strictly necessary – you can have a yummy mug cake without it. But if you want the real red velvet experience, you’ll need to add a few drops of red food coloring.
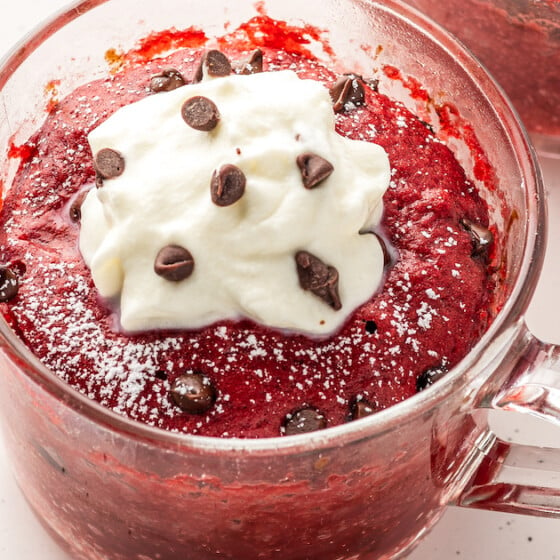
- Powdered Sugar, Mini Chocolate Chips, or Frosting: For decorating. These are totally optional! I do like to sprinkle a little something extra on top, though.

How to Make a Red Velvet Mug Cake
So how do you pull together this cute little dessert? It’s actually very similar to making real cake – you mix the dry ingredients and the wet ingredients separately, and then “bake.” It only takes a few minutes to do this:
- Make the Sour Milk. In a large mug, whisk (with a small whisk or large fork) together the milk and vinegar. Set aside.
- Combine the Dry Ingredients. In a small bowl, whisk together dry ingredients (flour, sugar, cocoa powder, baking powder, and salt).


- Combine the Dry and Wet Ingredients. Add to the milk mixture and add the vegetable oil and red food coloring. Whisk until smooth.
- Pour into the Mug. Scoop the cake batter into a microwave-safe mug.


- “Bake.” Cook in the microwave on high for 1 minute and 10 seconds. This recipe will rise and then deflate slightly since it’s being cooked in the microwave.
- Enjoy! Dust with powdered sugar and serve immediately.


Helpful Tips for Success
Making mug cakes like this is fun and easy, and it can be quite addictive, too. (I mean, it’s honestly a little dangerous to know that you can whip up something this luxurious, this fast. Right?) These helpful tips will make your mug cake baking even more successful.
- No Egg: My top tip is that mug cakes are better without eggs. I know, I know – eggs are essential in most cake recipes. But for a serving this small, cooked in a microwave, egg creates a spongy, unpleasant texture. Skip the eggs, and your cake will be much more luxurious.
- Stirring: Confession time: in the directions, I say to mix the dry ingredients separately (a mini whisk makes this much easier) and then add them, because that is what you should do. But honestly, sometimes I just dump all the dry ingredients into the milk mixture at once and stir the batter a ton. It still works just fine!
- Filling: There’s a fine line between having a nice big serving of cake, and having a red velvet volcano oozing all over your microwave – so be careful not to overfill your mug. You’re welcome.
- Serve Immediately: With most cakes, you must let them cool before frosting and serving. Not with these little guys! Serve your red velvet mug cake right away for the best texture and flavor.

How to Store and Reheat Leftovers
If you have a few leftover bites of your red velvet mug cake, you can cover the mug tightly with foil or plastic wrap, and keep it in your fridge for 24 hours or so. If you keep it longer than that, it will probably dry out. Uncover the mug and heat the cake briefly in the microwave before serving.

Can I Freeze This Mug Cake?
Like most cake recipes, this one can be frozen – although it may dry out in the freezer. I really recommend making them fresh, but if you want to freeze, just wrap the whole mug tightly in a couple of layers of foil or plastic wrap, and freeze it for up to two months. Before serving, let the mug cake thaw out in your fridge, and then heat it in the microwave for a few seconds to warm it back up.
Red Velvet Mug Cake
Ingredients
- 3 tablespoons milk
- ½ teaspoon white vinegar
- 4 tablespoons all purpose flour
- 2 tablespoons granulated sugar
- 1 teaspoon cocoa powder
- ¼ teaspoon baking powder
- pinch of salt
- 1 ½ tablespoons vegetable oil
- 5 drops red food coloring, optional
- powdered sugar for dusting on top, optional
- mini chocolate chips, optional
- pre-made frosting, optional
Want to save this recipe?
Instructions
- In a large mug, whisk (with a small whisk or large fork) together the milk and vinegar. Set aside.
- In a small bowl, whisk together dry ingredients (flour, sugar, cocoa powder, baking powder and salt). Add to the milk mixture and add the vegetable oil and red food coloring. Whisk until smooth. Sprinkle chocolate chips on top, if using.
- Cook in the microwave on high for 1 minute and 10 seconds. This recipe will rise and then deflate slightly since it's being cooked in the microwave. Dust with powdered sugar or top with frosting, and serve immediately!
⭐️ Tried this recipe? Leave a comment and rating! It only takes a minute and helps support our family-run blog. ❤️
Notes
Nutrition
Categories:
More Red Velvet Desserts You’ll Love
- Red Velvet Cupcakes
- Red Velvet Bundt Cakes
- Red Velvet Crinkle Cookies
- Red Velvet Cheesecake Brownies
Post may contain affiliate links. Read my disclosure policy.

It was absolutely delicious! I didn’t add chocolate chips into the mix but sprinkled cream cheese chips on top before microwaving.
The cake was so moist, soft and delicious by itself. I made a cream cheese frosting to go with it and it’s so good! Finally found a red velvet mug cake that tastes like red velvet. Thanks for including how to make the buttermilk.
Hi George, it looks like it rose a lot and then shrank way down. It’s normal for a mug cake to rise while cooking in the microwave and then fall some, but I believe you may have mis-measured an ingredient or possibly forgot the ¼ teaspoon baking powder? This mug cake does not normally look like your picture. I’m sorry you had issues with it.
This was very good for a mug cake! The texture of the cake was delicious. I topped it off with a quick vanilla glaze and it really hit the spot.
I tried this recipe keeping 1 tbsp flour/coca pdr = 8g and it turned out really well. iI also added white chocolate chips to the mix. Definitely recommend serving with slightly sweetened whipped cream for the best dessert binge!
Need ed a little more time
Dang this is good thanks for the recipe, Ive never made one of these before and if u add some white choco chips snd extra dugar it is certainly so bomb
jessica this mug cake was so delectable
so good!!
Tried the recipe. It was awful. I’ll stick to Cakeman Raven’s recipe for a large batch and just freeze the cake because this just isn’t real red velvet.
These were so good, tysm!
I love mug food, they’re so easy to make and so delicious. I LOVE red velvet, it is sooooooo good. I am going to make this, I hope it tastes as good as it looks.
Usually in comments it rates the recipe after trying it, not impressions of recipe. Wow this looks awesome if you haven’t tried it yet?
I tried this recipe and it was awful. Came out like sawdust. Not at all like picture.
Waste of ingredients. And I’m a pro baker.
Um I’m confused. You’re a ‘pro baker’ and this mug cake from this AMAZING TRUSTWORTHY blog didn’t work? I under measured my flour and it was not sawdust, in fact it was very moist. Hmmmm
I haven’t had red velvet in much too long.
I’m also very thankful that you cut my recipe reading in half by including how to make the buttermilk.
You’re welcome! Glad you enjoyed it!
The absolute BEST MUG CAKE i have made. this recipe is the only one I trust for red velvet
So glad you enjoy it Mimi!
Super moist and delicious, unlike most other mug cakes out there! Thanks for the recipe!
WOW! So moist and PERFECT! Really hit the sweet tooth spot. I do make a full red devil’s food/red velvet cake for special occasions; this has all the flavor and none of the leftovers LOL!
*Used buttermilk for the milk/vinegar because it was here and skipped the food coloring because I couldn’t trust my pour to not make a mess of 5 drops. Cook time worked for my microwave.
Great recipe and thanks!
I just want to know what size mugs. I tried random ones I had, and some did not fill up, and others ran over the side. Thanks. Very good.
Hey! Looks very delicious. Moreover, it’s not too difficult to make so I will try soon. Thanks for your sharing!
Is that 1/2 a tablespoon of oil?
It’s 1 1/2 tablespoons of oil – so one and one half tablespoons. 🙂
Would this be as good with a sugar substitute?