
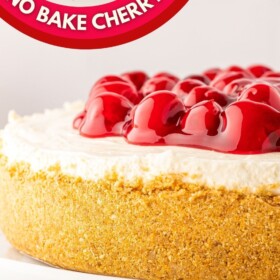
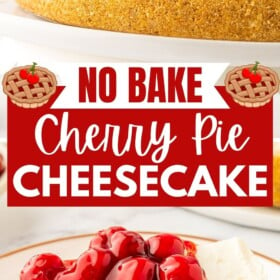
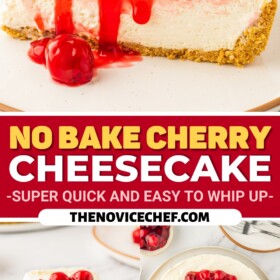
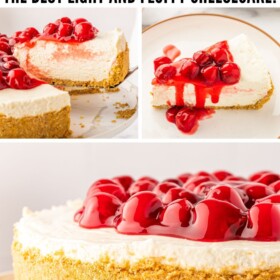
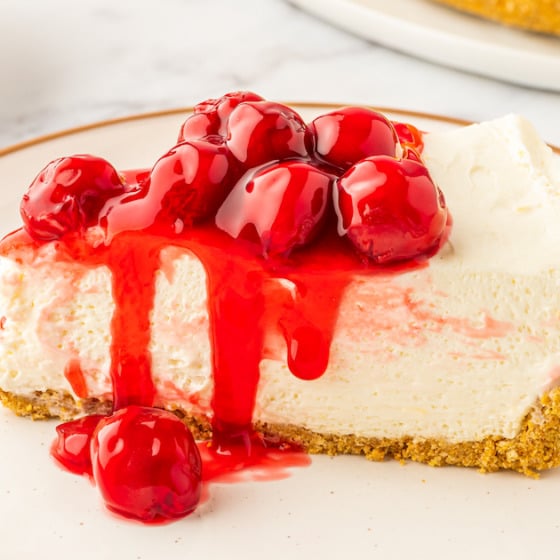
Cheesecake is a classic dessert that never fails to impress, and adding a sweet cherry pie topping takes it to the next level. This light and airy No Bake Cherry Cheesecake is quick and easy to whip together, but looks and tastes like you spent hours on it!

Why You’ll Love Making No Bake Cherry Cheesecake
There are so many reasons I love this easy no-bake cherry cheesecake, but here are just a few:
- Easy: This no-bake cherry cheesecake is so simple – no oven, no worries! It’s perfect for making in the summer, when you want a sweet treat without heating up the kitchen!
- Creamy: No-bake cheesecake is famous for it’s smooth, creamy texture and decadent flavor…and this recipe absolutely delivers! With a luscious cherry topping, it is unbeatably delicious!
- Versatile: You can easily change up the flavors in this cheesecake by using a different topping, extracts, or mix-ins! Read below in the post to see some of my favorites!
- Affordable: This recipe uses simple affordable ingredients and a can of cherry pie filling to keep your wallet happy.
- Travels Well: And most of all, this no-bake cherry cheesecake travels wonderfully! If you are going further than 30 minutes, pop it in a cooler, but otherwise it travels great to take to a party.
- Crowd Favorite: Cheesecake? Who says no to cheesecake? It’s a well loved classic dessert that everyone will want a slice of!

What You’ll Need
The ingredients here are so basic and simple, you might already have most of them on hand! A can of pie filling, some cream cheese, and a few more ordinary baking items are all you need.
- Crust: A store-bought graham cracker crust, or you can make your own Homemade Graham Cracker Crust if you prefer.
- Heavy Whipping Cream: Don’t substitute half and half or milk – you need to be able to whip the cream.
- Cream Cheese: Set this out and let it come to room temperature before you bake.
- Powdered Sugar: Be sure to use powdered sugar, not granulated – granulated sugar is harder to dissolve and can leave tiny spots of moisture.
- Vanilla: Pure vanilla extract, or vanilla bean paste if you prefer.
- Lemon: A bit of lemon juice and freshly grated lemon zest elevates this dish and makes it taste homemade.
- Cherry Pie Filling: Just like in my easy black forest cake recipe, I use canned Cherry Pie Filling to keep this recipe simple. It makes the perfect no-hassle topping! However, if you would prefer, you can always make your own instead.


How to Make No-Bake Cherry Cheesecake
Get ready to make the easiest dessert ever! This is so fun and simple to do. Here are the steps:
- Whip the Cream: Beat the heavy whipping cream in a medium bowl, until stiff peaks form. Set the whipped cream aside.
- Beat the Remaining Filling Ingredients. In another medium bowl, beat the softened cream cheese, powdered sugar, vanilla, lemon zest, and lemon juice until creamy and smooth.
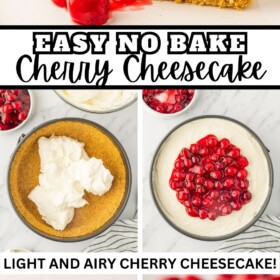
- Fold in the Whipped Cream. Gently fold the whipped cream into the cream cheese mixture, to get a lighter cheesecake filling.
- Fill the Crust and Chill. Spread the cheesecake mixture into the crust, smoothing the top. Refrigerate for 30 minutes.
- Add Topping and Chill Longer. Gently spoon the cherry pie filling over the center of the cheesecake using a spoon. Leave the edges of the cheesecake. Cover with plastic wrap, and refrigerate for at least 4 more hours, or overnight.
- Enjoy! Once set, carefully slice and serve!

Tips For Success
So there you have it – a scrumptious chilled cheesecake dessert, effortless to whip up and gorgeous, as well. Be sure to read through these tips and variations before you get started, for an even better result:
- Cool Whip: If you would prefer to use Cool Whip instead of whipped cream, that’s fine! You will need 2 and ½ cups of cool whip.
- Cream Cheese: Bringing the cream cheese to room temperature before making the recipe is also important, to ensure that it blends well with the other ingredients without any lumps.
- Stiff Peaks: Whipping the heavy cream to stiff peaks is crucial for adding air and lightness to the cheesecake layer. Stiff peaks means that you can lift the beater out of the whipped cream, and the “peaks” of whipped cream that are stuck to the beater are stiff and firm. If the peaks sink back down or drip off, keep beating the cream.
- Over-Whipping the Cream: Be careful not to overbeat the whipped cream, or it will turn grainy – those grains are actually butter, and can’t be turned back into whipped cream.
- Chilling: Refrigerating the cheesecake layer before adding the cherry pie filling is an important step because it helps to set the cheesecake layer and prevent the cherry pie filling from sinking in.

Flavor Variations
Cherries and cheesecake is a classic combo, but there are a ton of ways you can change up this easy basic recipe to feature different flavors.
- Extracts: You can use extracts to change up the flavor easily in a no-bake cheesecake. Like almond extract, maple extract, etc.
- Mix-Ins: Crushed or chopped Oreos, cookies, candy bars, M&Ms, nuts, etc.
- Toppings: You can use any canned pie filling for a topping or this easy Homemade Apple Pie Filling. Lemon Curd, Homemade Nutella, Salted Caramel Sauce, Dulce De Leche or any jam/jelly are also great cheesecake toppings. Simple fresh fruit, like sliced strawberries, blueberries or blackberries are a refreshing and easy topping.
(By the way, for a fun spin on cherry cheesecake, try these cute Cherry Cheesecake Tacos!)

How to Store No-Bake Cherry Cheesecake
Store any leftover cheesecake in the refrigerator, covered with plastic wrap or in an airtight container. It will stay fresh for up to five days. (Not that it would last that long around here!)
Can I Freeze This?
Yes, you can freeze this easy no-bake cherry cheesecake! For best results, freeze it without the topping. Just add it when you’re ready to serve.
If you want to freeze individual slices, wrap them tightly and then store them in a freezer bag. You can also store the entire cheesecake if you prefer, wrapped in two layers of plastic wrap, or a layer of plastic wrap and another of foil. Either way, the cheesecake will keep in the freezer for up to 3 months. Thaw in the fridge before serving.

More Delicious Cheesecake Recipes
If you love cheesecake, you have come to the right place! My family *LOVES* cheesecake! Here are some of my other cheesecake recipes I think you will enjoy:
- Easy Instant Pot Cheesecake
- Triple Coconut Cheesecake
- Easy Sopapilla Cheesecake Bars
- Almond Amaretto Cheesecake
- Easy Pumpkin Pie Cheesecake
- Banana Pudding Cheesecake
- Tiramisu Cheesecake
- Easy Eggnog Cheesecake
- Best Pumpkin Cheesecake
No Bake Cherry Cheesecake
Ingredients
- 1 batch graham cracker crust
- 1 ¼ cups heavy whipping cream
- 3 8 oz blocks cream cheese, room temperature
- 1 cup powdered sugar
- 1 teaspoon pure vanilla extract
- 2 teaspoons grated fresh lemon zest
- 1 tablespoon fresh lemon juice
- 1 (21 oz) can cherry pie filling
Want to save this recipe?
Instructions
- Line a 9-inch springform pan with parchment paper and set it aside. Prepare the graham cracker crust and transfer the mixture to the springform pan and press it firmly up the sides. Chill for 2 hours or freeze for 10-15 minutes in freezer.
- Beat the heavy whipping cream in a medium bowl until stiff peaks form. Set aside.
- In another medium bowl, beat the softened cream cheese, powdered sugar, vanilla, lemon zest, and lemon juice until creamy and smooth.
- Gently fold the prepared whipped cream into the cheesecake mixture.
- Spread the cheesecake mixture over the crust, smoothing the top. Cover with plastic wrap and refrigerate for at least 4 more hours, or overnight.
- When ready to serve, you can gently add the cherry pie filling in the center of the cheesecake layer using a spoon then slice and serve. Or you can add the cherry pie filling on top of each individual slice as you serve them!
⭐️ Tried this recipe? Leave a comment and rating! It only takes a minute and helps support our family-run blog. ❤️
Notes
- Mini Cheesecakes: You can use the same recipe and make mini cherry cheesecakes, using a muffin pan!
- Cool Whip: If you would prefer to use Cool Whip instead of whipped cream, that’s fine! You will need 2 and ½ cups of cool whip.
- Cream Cheese: Bringing the cream cheese to room temperature before making the recipe is also important, to ensure that it blends well with the other ingredients without any lumps.
- Stiff Peaks: Whipping the heavy cream to stiff peaks is crucial for adding air and lightness to the cheesecake layer. Stiff peaks means that you can lift the beater out of the whipped cream, and the “peaks” of whipped cream that are stuck to the beater are stiff and firm. If the peaks sink back down or drip off, keep beating the cream.
- Over-Whipping the Cream: Be careful not to overbeat the whipped cream, or it will turn grainy – those grains are actually butter, and can’t be turned back into whipped cream.
- Chilling: Refrigerating the cheesecake layer before adding the cherry pie filling is an important step because it helps to set the cheesecake layer and prevent the cherry pie filling from sinking in.
- Storing and Freezing: Store in an airtight container in the refrigerator for up to 5 days. Freeze without the cherry topping for up to 3 months.
Nutrition
Categories:
Post may contain affiliate links.
