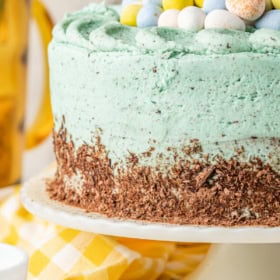
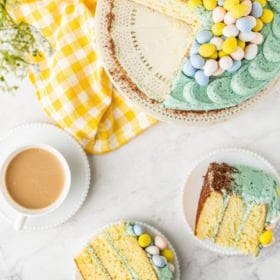

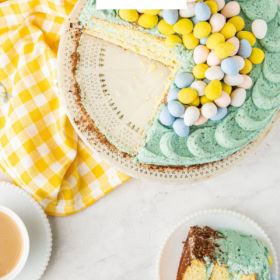

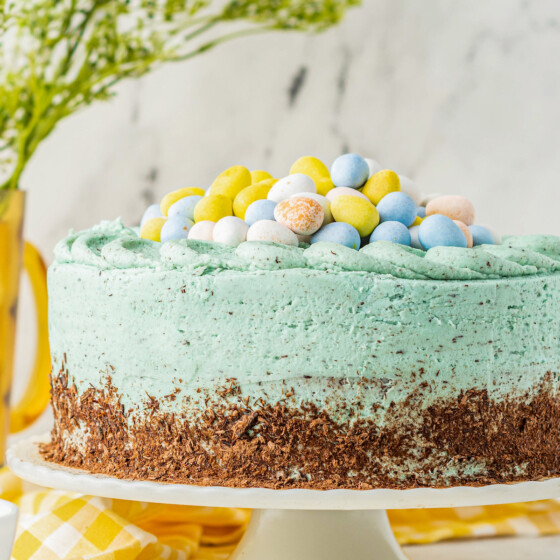
With robin egg speckled frosting and pastel candy eggs, this Easter Cake adds a festive touch to your holiday table! Soft and fluffy vanilla-orange cake is perfectly complimented with a sweet buttercream frosting with a hint of chocolate.

Reasons To Love This Easter Cake
- Festive: The pastel colors and speckled frosting are perfect for Easter!
- Texture: Each cake layer is soft, fluffy, and moist.
- Taste: A hint of orange with a light chocolate flavor from the frosting.
- Skill Level: Beginner friendly with no fancy skills required!
- Make Ahead: Prepare it up to 48 hours in advance.
This Easter Cake is perfectly festive with speckled robin’s egg blue frosting and candy eggs piled on top! The soft, buttery cake layers have a hint of orange, perfect for spring. It’s one of our favorite Easter traditions, and just like my favorite easy Easter bunny cake, it never fails to bring a smile to everyone’s face.

Key Ingredient Notes
Almost all of these simple ingredients can be found in the baking aisle. Use room temperature ingredients to ensure a smoother batter and even baking. Scroll down to the recipe card below for the full ingredient list and exact amounts!
- Flour: Measure your flour by fluffing it, then spooning it into the measuring cup, and leveling it with the back of a butter knife. If you dip the cup into a packed bag of flour, you’ll use too much flour creating an overly dense cake.
- Greek Yogurt or Sour Cream: While buttermilk adds obvious moisture to the cake, greek yogurt (or sour cream) adds a silky, rich moisture that takes this cake to the next level.
- Orange Extract: This gives the cake its wonderful flavor, without changing the consistency. If you added orange juice, you would need to adjust the recipe quite a bit to compensate for the added liquid. Orange extract makes it simple.
- Orange Zest: Orange zest helps bring out the orange flavor as well as depth in this delightful cake.
- Shredded Chocolate: For this, I used a vegetable peeler on a bar of Ghirardelli dark chocolate. I first tried a zester/microplane but the pieces were far too small. The use of the shredded chocolate is to complete the buttercream’s robin’s egg effect.
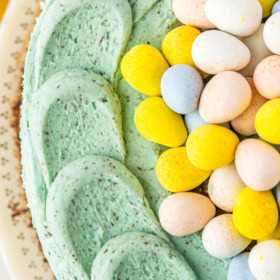
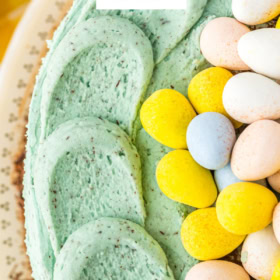
- Chocolate Candy Eggs: I used mini Cadbury chocolate eggs, pastel colored egg candy works great on top as a garnish.
- Buttermilk: This is a key ingredient to get that moist, dense, but still soft texture! In a pinch, you can substitute it for regular whole milk with 1 tablespoon of white vinegar whisked in 5 minutes before adding to the batter.

How to Make this Easter Cake
This Easter Cake easily achieves a bakery-quality appearance without requiring professional skills. Just make sure your cake layers are completely cool before frosting them and you shouldn’t have any issues! Below is a very quick recipe overview, please scroll down to the recipe card below for full instructions.


How To Pipe Scalloped Frosting Along the Edges of the Cake:
Spoon frosting into a piping bag fitted with a round piping tip. Pipe a dot about the size of a quarter onto the top of the cake near the edge. Using the end of the offset spatula or the back of a spoon, press into the center of the piped dot and pull out and flatten into the buttercream base. Pipe another dot onto the end of the previous “smashed” dot, about ¾ of the way through it and repeat the previous step. Repeat all the way around the edge of the cake to create a wreath effect.

Easter Cake Tips & Variations
- Don’t Over-Mix: Mix just until the dry and wet ingredients are well combined to maintain a soft and tender crumb.
- Frosting Tips: Use a crumb coat (a thin first layer of frosting helps trap crumbs for a cleaner final appearance) and chill the cake for 30 minutes before doing a thick final layer of frosting.
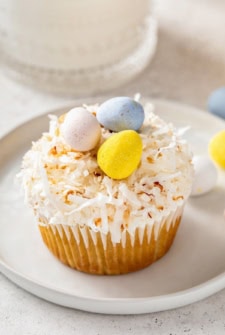
- Make a Coconut Nest: Like my Easter cupcakes, you can use toasted coconut to create a nest on top for the candy eggs to sit in.
- Buttercream Substitute: If you’re not a fan of buttercream frosting, try my favorite cream cheese frosting recipe instead.
- If Making the Cake Ahead: Sometimes it’s nice to bake in batches! You can bake the cake layers and then freeze them until you’re ready to make frosting, if need be.


How to Store Cake or Make Ahead
- Prepare in Advance: The cake layers can be baked in advance, allowing you to assemble and decorate closer to your event. Wrap them in plastic wrap and refrigerate for up to 5 days. Or freeze, wrapped in plastic wrap followed by a layer of foil, for up to 3 months.
- Store at Room Temperature: If you’re serving the cake the same day or within 24 hours, you can keep it at room temperature. Just make sure it’s covered and kept in a cool, dry place away from direct sunlight.
- Store in Refrigerator: If not serving the same day, cover the cake with plastic wrap (or store it in an airtight cake container) and refrigerate for up to 5 days. The buttercream will firm up in the fridge, so let the cake rest at room temperature for about an hour before serving.
Speckled Easter Cake
Ingredients
For the Cake:
- 2 ⅓ cup all-purpose flour
- 1 tablespoon baking powder
- ¾ teaspoon salt
- 1 ½ cup granulated sugar
- 4 large eggs
- 1 cup (2 sticks) unsalted butter, softened
- ¾ cup buttermilk
- ¼ cup plain greek yogurt, or sour cream
- 1 ½ teaspoon orange extract
- 1 teaspoon vanilla extract
- Zest from 1 orange
For the Buttercream:
- 1 ½ cups (3 sticks) butter, softened
- 6 cups powdered sugar
- ¼ cup whole milk
- 1 ½ teaspoon vanilla extract
- Pinch of salt
- Blue food coloring
- 1 cup grated/shredded chocolate, separated
For the Topping:
- Chocolate candy eggs, like robin eggs or mini cadbury eggs
- Shredded chocolate, use a knife or vegetable peeler on a chocolate bar
Want to save this recipe?
Instructions
For the Cake:
- Preheat the oven to 350°F. Spray three 8-inch cake pans with baking spray and set aside. You can also use two 9-inch cake pans instead, but they will need a longer bake time.
- In a large mixing bowl, whisk together the sugar and eggs until smooth. Add in the butter and whisk for a minute or two until the butter is well integrated. Add in the buttermilk, greek yogurt, orange extract, vanilla extract, and orange zest. Whisk until smooth.
- In a medium mixing bowl, whisk together the flour, baking powder, and salt. Add the flour mixture into the wet mixture and fold together until there are no flour clumps. Do not over-mix, stir just until the batter combines.
- Evenly divide batter into greased cake pans and place into the preheated oven to bake. For 3 cake pans, bake for 12 to 14 minutes or until a toothpick inserted comes out clean or with moist crumbs and the edges are browned and pulling away from the sides of the pan. For 2 cake pans, expect the baking time to be about 16 to 18 minutes.
- Once baked, remove from the oven and place on a cooling rack to cool. While the cakes are cooling, make the buttercream.
For the Buttercream:
- In the bowl of a stand mixer or with a hand mixer, combine butter, powdered sugar, milk, vanilla and salt. Using a paddle attachment, begin beating on low so that the powdered sugar does not explode everywhere. After a minute or two, once the frosting has started to come together, increase the speed to medium high. Beat frosting for about 4 minutes or until it is light and fluffy.
- Add in blue food coloring, a little at a time until you have reached the desired color. Add in 3/4 cup of the shredded chocolate, reserving the rest for garnishing the cake.
Assemble and Decorate:
- Place one layer onto a cake stand or plate. Spoon about 1/2 – 3/4 cup of frosting onto the bottom layer. Using an offset spatula, spread the frosting around in an even layer, spreading the frosting all the way to the edge.
- Stack the second layer directly on top and spoon another 1/2 cup to 3/4 cup of frosting on top and spread again. Spoon a little extra buttercream around the outer ½ inch edge. Place the last layer on upside down. The extra buttercream lip will make up for the slight dome your last layer of cake will have so that there is no gapping. Placing the top layer on upside down gives us a flat surface to frost making it easier to have even, smooth results.
- Frost the top and the sides as desired, adding the eggs on top of the center of the cake. Press the remaining 1/4 cup of shredded chocolate onto the bottom edge of the sides of the cake. (I did this by pouring a little bit of chocolate into my hand at a time and gently pressing it onto the side of the cake.) Slice and serve cake immediately or store in an airtight container (following directions below).
⭐️ Tried this recipe? Leave a comment and rating! It only takes a minute and helps support our family-run blog. ❤️
Notes
- Room Temperature: You can store this cake in an airtight container for up to 24 hours, keeping it away from heat or direct sunlight.
- Fridge: Cover the cake with plastic wrap, or store it in an airtight cake container, and refrigerate it for up to 5 days. The buttercream will firm up when chilled, so make sure to set the cake out at room temperature for at least 1 hour before serving for the best texture.
- Freeze: Wrap individual slices tightly in plastic wrap, then in a layer of foil. Place in a freezer-safe bag or container and freeze for up to 3 months. To thaw, transfer slices to the fridge overnight or let them sit at room temp for about 30 minutes.
Nutrition
More Festive Easter Recipes To Try


Post may contain affiliate links. Read my disclosure policy.
